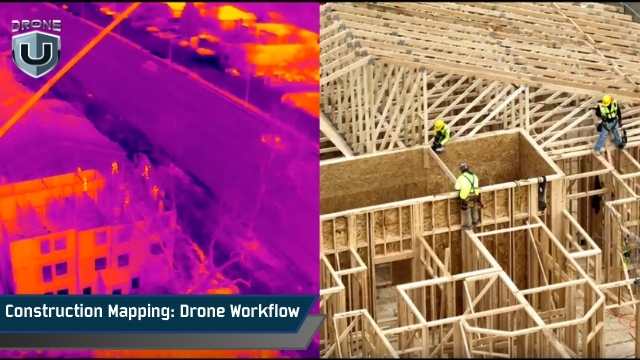
Construction Mapping: Complete Drone Workflow Guide
December 20, 2025
What if you could map an entire construction site in minutes, not days? It is not theoretical anymore. With modern drone mapping and GIS workflows, you can do it.
Drones can capture high-resolution imagery and generate accurate 3D models. Teams can track progress, measure stockpiles, and compare designs to as-built conditions faster, more safely, and more efficiently than traditional ground-based methods.
If slow surveys, misaligned data, or costly rework have been holding your projects back, a structured construction mapping workflow can change the game.
This guide walks you through every step of construction mapping, from planning and ground control to flying, processing, and applying results. We’ll also cover how to fly smarter, map faster, and deliver accurate data every time.
Let’s start with the basics.
Construction mapping starts with a simple idea: you capture aerial photos of a site, and turn them into accurate maps, models, and measurements. These images overlap heavily, so the software can stitch them together and recreate the site in 2D and 3D. Once processed, you can measure, compare, and use the data throughout the project.
Most construction mapping relies on photogrammetry, which uses overlapping images to create 2D orthomosaics and 3D models. Each image includes GPS metadata, allowing processing software to align photos with real-world coordinates. The better the positioning data, the more reliable your measurements will be.
For higher precision, pilots use RTK (Real-Time Kinematic) or PPK (Post-Processed Kinematic) systems. These reduce GPS errors down to a few centimetres, which is essential when tracking progress or verifying earthwork.
Some projects may also use LiDAR sensors. LiDAR captures dense point clouds by measuring laser reflections. It’s especially useful for sites with vegetation, complex terrain, or areas where photogrammetry struggles.
Understanding these basics helps you choose the right workflow, sensors, and tools for each project.
Next, let’s understand how to plan and prepare your site for accurate construction mapping surveys.
A smooth construction mapping workflow starts long before the drone takes off. Pre-flight planning ensures accuracy, compliance, and efficient data collection.
Clarify exactly what you need to capture. The objective determines flight altitude, overlap, path, and sensor choice. Common goals include:
Clear goals prevent wasted flight time and ensure the right level of detail.
Map the area in person or review plans. Check:
Understanding the site reduces risk and guarantees full coverage.
Your mission must comply with FAA rules and any local regulations.
Verify:
Planning around these factors helps avoid delays and ensures compliance.
For more details about airspace approvals, you can watch How to Apply for an Airspace Authorization From the FAA video.
For situations where NOTAMs aren’t available, check out the “What Drone Pilots Can Do When NOTAMs Are Not Available” video to explore alternative steps.
Use your goals, site info, and regulations to define:
Avoid underestimating overlap or GSD requirements. Small planning errors can lead to poor models and inaccurate measurements. Also know that depending on the drone you’re flying, the overlap can be different. The last few DJI mapping drones have changed the sensor size, so typically, you want a higher frontal overlap.
Now, let’s learn how to set up precise ground control and positioning for accurate results.
Accurate construction mapping depends on precise positioning. Even with a perfect flight, your data can be off if the drone’s GPS isn’t properly corrected. Ground control, RTK, and PPK workflows ensure your maps line up with real-world coordinates.
GCPs are marked points on the ground with known coordinates. They anchor your map to the real world.
How to use them effectively:
GCPs are essential when clients require audit-grade accuracy or when you need precise design-to-as-built comparisons.
Modern drones support:
Even with RTK/PPK, a few checkpoints validate your data for critical projects.
Smart markers, such as AeroPoints, reduce manual mapping time. They automatically log their position, which saves time on large or complex sites.
Before flying, confirm that:
A single misplaced GCP or weak RTK signal can compromise your model. Reliable ground control forms the backbone of high-accuracy construction mapping.
Next, let’s explore what happens on-site when it’s time to fly the mission.
Flying the mission correctly is where your careful preparation pays off. The goal is clear: capture consistent, high-accuracy imagery for maps and models.
Before you launch, run through a full pre-flight checklist:
During the flight:
After landing:
Always review your images on-site if possible. Catching problems early, such as blurry images or missed areas, saves time and prevents costly re-flights.
Carefully flying the mission gives you accurate, reliable data. Let’s review how to turn that imagery into usable maps and models in the next section.
After capturing your drone mapping data, processing turns the images into usable maps, models, and measurements.
Start by organizing your files immediately.
Create a clear folder structure based on project name, date, and flight number. Keep your GCP coordinates, RTK/PPK logs, and field notes in the same directory.
This simple step prevents confusion later, especially when you’re managing repeat surveys.
Choose where you want to process your data: in the cloud or on the desktop.
Cloud tools like DroneDeploy or Propeller Aero make large datasets easy to manage and share with teams.
Desktop tools like Pix4D or Agisoft Metashape give you more control over processing settings and are ideal when you need precise tuning.
Make sure your software supports your image format and can import any correction files from your RTK/PPK workflow.
Want to find out the best platform for construction mapping? Watch our full guide, Which is a Better Modeling Platform – DroneDeploy or Pix4D?
The core processing steps are the same across most platforms.
The software aligns your images by finding common points across photos. These tie points help build a sparse point cloud.
From there, the software reconstructs a dense 3D point cloud and creates an orthomosaic and DSM/DTM.
If you used GCPs, RTK, or PPK, this is where you apply your corrections to lock your map into real-world coordinates.
Always run accuracy checks before you export anything.
Compare your independent checkpoints against your processed outputs to confirm your RMSE values are within acceptable limits.
Look for alignment gaps, blurry areas, or elevation spikes. Vegetation, shadows, or reflective surfaces can create noise, so be ready to filter or reprocess specific areas if needed.
Some projects need more than standard photogrammetry.
You may stitch multiple flights into a single large map or use LiDAR for sites with thick vegetation or steep terrain.
Each site is unique, so choose the tools and workflows that fit the conditions, not just the software defaults.
Processing is only as good as your field data. Keep logs of any anomalies during the flight so you can address them during processing. Consistency ensures your maps and models are trustworthy.
With processing complete, your imagery is now ready to generate core and construction-specific deliverables. Let’s explore that in the next section.
Your imagery becomes useful once you turn it into deliverables that the construction team can actually apply on-site. These outputs guide decisions, verify work, and help crews track progress at every stage.
These are standard products every professional drone pilot produces:
Orthophotos/Orthomosaics: High-resolution, georeferenced aerial maps that accurately represent the site. They are perfect for site inspection, planning, and reporting.
DSM/DTM: Digital Surface Models (DSM) include features such as buildings and vegetation, while Digital Terrain Models (DTM) show the bare ground. They’re essential for grading, earthwork, and design verification.
3D Point Clouds & Textured Meshes: Detailed 3D representations of the site for visualization, engineering analysis, and integration into BIM or project planning tools.
Volumetric measurements: Accurate calculations for stockpiles, cut, and fill.
Drone mapping adds real value when tailored to construction needs:
Deliverables must integrate seamlessly into your team’s workflows:
Deliver a simple “data package” folder every time. Include the orthomosaic, DSM/DTM, point cloud, 3D mesh, and a read-me file with notes on accuracy, flight date, and processing details. It keeps everything clear and consistent for future mapping projects.
Next, let’s analyze how construction teams actually use these deliverables on the job site.
Having accurate drone mapping data is only valuable if it’s applied effectively on the construction site. This is where your deliverables influence decisions, timelines, and costs.
Your Digital Surface Models (DSMs and DTMs) and volume reports help crews measure cut and fill precisely. Instead of relying on rough estimates, contractors can bill based on actual volumes and verify that grading matches the plan. This reduces disputes and keeps budgets steady.
When you compare one survey to the next, you give teams a clear view of how work is moving. Orthophotos and 3D models show what’s done, what’s delayed, and what needs attention. These visuals make communication with managers and stakeholders far easier.
Design-to-as-built comparisons help identify errors before major milestones, like concrete pours or structural assembly. catching deviations early prevents costly rework and improves site safety.
Your construction mapping outputs help confirm that utilities, roads, pads, and other infrastructure match the design. This alignment prevents conflicts in future phases and reduces layout errors.
You can share your maps, models, and progress snapshots with managers, surveyors, subcontractors, and clients. When everyone uses the same visuals, collaboration improves, and decisions can be made faster.
Integrate drone outputs directly into your project management software or BIM system. When survey data feeds directly into planning tools, teams respond quicker, and workflows stay tight.
Applied correctly, your drone maps become practical, daily-use tools that improve accuracy, efficiency, and cost control across the entire project.
Here’s a practical, step-by-step workflow for professional drone pilots in construction mapping:
Determine the goal of your mapping mission. Are you tracking earthwork, measuring stockpiles, comparing designs, or creating 3D models? Your objective drives all other steps.
Assess the site, set flight boundaries, determine altitude and overlap, and select the flight path. Check weather, airspace, and regulatory requirements.
Set up GCPs, RTK/PPK base stations, or smart markers. Verify placement and log reference points for accurate positioning.
Conduct pre-flight checks, execute the flight using your planned path, and monitor satellite lock, overlap, and terrain following. Collect metadata and retrieve control points after landing.
Organize and upload images to processing software. Generate orthomosaics, DSM/DTM, point clouds, and 3D models. Apply GCP or RTK/PPK corrections.
Perform RMSE checks and review checkpoints. Troubleshoot distortions, low overlap, or exposure issues. Ensure results meet required accuracy standards for construction mapping.
Generate outputs in client-ready formats: CAD, GIS, BIM, and survey-specific files. Confirm compatibility with stakeholder systems.
Use maps and models for progress tracking, earthwork verification, design-to-as-built comparison, and decision-making. Share results with project teams for collaboration.
Keep a record of each step, including challenges and solutions. This ensures repeatable, consistent results for future surveys.
Construction mapping is now a key part of how modern job sites stay accurate and efficient. A solid drone mapping workflow helps you capture reliable data, avoid rework, and keep projects moving on time. When you plan well, fly consistently, and process your data carefully, you get results that teams can trust.
If you want smoother, more accurate construction mapping results, start by standardizing your workflow and using tools that keep your data consistent. This makes every mapping mission easier, faster, and more useful for your team.
Ready to upgrade your construction mapping skills?
Join DroneU’s Construction Drone Mapping Course and learn how to fly, process, and validate professional-grade construction mapping data.