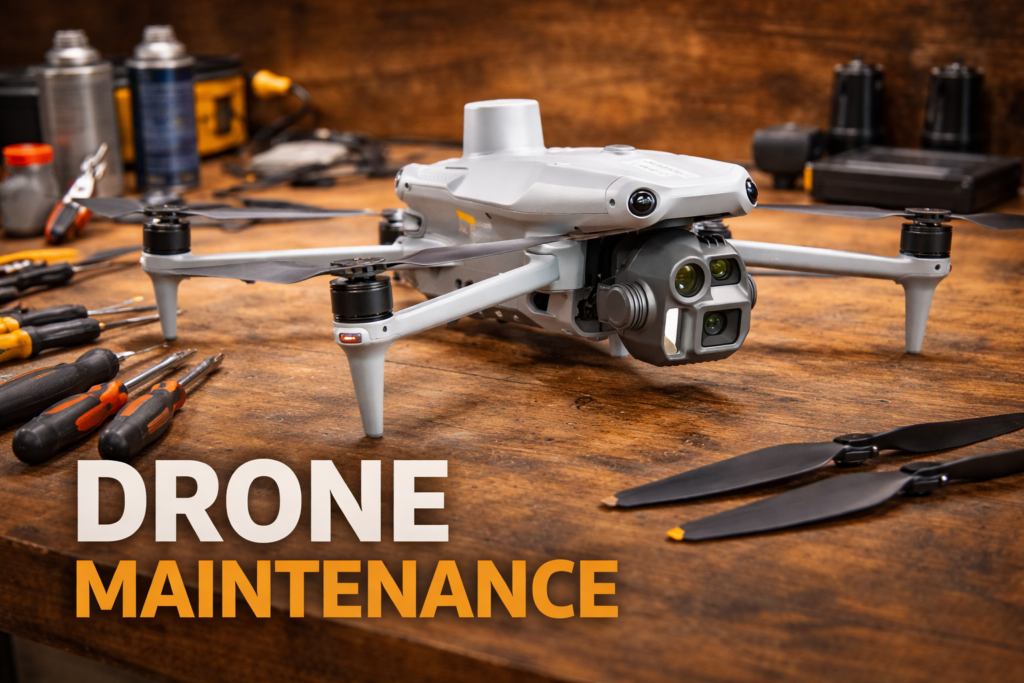
How to Extend the Life of Your DJI Drone: A Professional 12-Point Guide

April 13, 2026
DJI drones don’t suddenly fail. They slowly degrade based on how they’re flown, stored, charged, updated, and maintained. The difference between a drone that lasts two years and one that lasts six is rarely the model or the price. It’s the pilot’s habits.
Below are 12 real-world practices used by experienced pilots and commercial drone programs to extend the lifespan of DJI drones far beyond what most users expect. Each step includes what to do, what to avoid, and why it matters.
Why it matters: Total flight hours are a poor predictor of drone health. What actually kills a DJI drone is the component condition.
Experienced pilots have flown Inspires for thousands of hours on demanding commercial jobs like boat cinematography, surf shoots, and long-range mapping without failure, because they watched their components, not their logbooks.
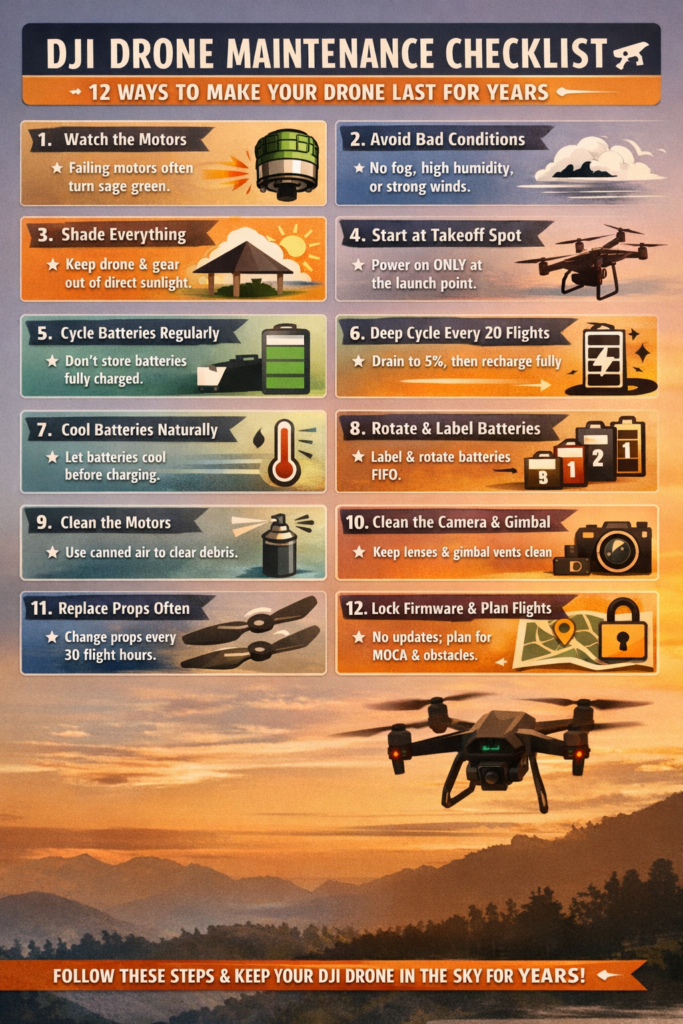
One sign only seasoned pilots know to look for: failing motors often turn a sage green color as they age. This discoloration appears weeks before any flight anomaly. If you know what to look for, your drone will warn you long before it fails.
PRO TIP: Color change in motors typically appears weeks before any detectable flight anomaly. Build motor inspection into your regular cleaning routine, not your troubleshooting checklist.
Why it matters: flying in marginal conditions forces every component to work harder and age faster.
Just because a drone can fly in a given condition doesn’t mean it should. High winds force motors to pull significantly more amperage from the battery, accelerating wear on both motor and battery aging. Moisture creates condensation risk inside sealed electronics.
Why it matters: heat is the single fastest accelerant of battery and electronics degradation and it is entirely preventable on the ground.
Heat damage to lithium batteries and electronics is cumulative and irreversible. A battery left on a sun-heated surface for 20 minutes before a flight has already lost capacity it will never recover. Managing ambient temperature consistently is one of the highest-return habits in this guide.
PRO TIP: A collapsible shade tarp or reflective case liner costs under $20 and can meaningfully extend battery life over the course of a season of shooting in hot climates.
Why it matters: walking with a powered-on drone corrupts IMU data and causes gimbal drift — slowly and invisibly over dozens of flights.
When you power on a drone and then walk to your takeoff spot, the IMU records that motion as part of its initialization. Over time, this introduces cumulative errors that manifest as gimbal tilt, floating horizons, and compass instability — problems that feel like hardware failure but were caused by operator habit.
Battery management is the single highest-leverage area of DJI drone longevity. More drones are degraded prematurely by poor battery habits than by any other cause. The five steps below form a complete battery management system.
Why it matters: Batteries that sit unused degrade faster than batteries that are flown regularly.
This is counterintuitive to most owners. The instinct is to preserve a ‘good’ battery by using it sparingly. The reality is the opposite: lithium chemistry requires regular charge-discharge cycles to maintain cell balance and internal gauge accuracy. Drones that are flown frequently, even recreationally, consistently outlast drones kept in storage.
Why it matters: the battery’s internal fuel gauge drifts over time and must be reset to maintain accurate remaining-charge readings.
DJI smart batteries use an internal gauge to estimate remaining charge. Over dozens of flights, this gauge drifts, causing the battery to report inaccurate percentages that can lead to unexpected shutdowns. A deep cycle resets the gauge. DJI recommended this in official documentation for years, and professional pilots confirm it meaningfully extends usable battery life.
Every ~20 flights, complete this sequence:
PRO TIP: Log which flight number each battery is on with a sticky label and tally mark. It takes five seconds per session and removes all guesswork about when a deep cycle is due.
Why it matters: Charging a hot battery accelerates chemical degradation and permanently reduces its total cycle count.
After a flight, batteries retain significant heat, especially after demanding operations or in hot ambient conditions. Plugging a hot battery into a charger immediately is one of the fastest ways to shorten its life. The damage is irreversible and cumulative.
Artificial cooling weathers the battery and reduces total cycle count.
Why it matters: unused batteries age just as quickly as flown ones — sometimes faster.
Many pilots buy a large battery inventory for future use, then fly from the same two batteries while the rest sit on a shelf. Those shelf batteries lose capacity every month regardless of use. Any battery unused for 6 or more months is at significantly elevated risk of failure, swelling, or total gauge calibration loss.
Why it matters: uneven cycling creates a two-speed fleet where some batteries fail early while others are chronically underused and degrading in storage.
Without a labeling system, pilots instinctively grab the same battery first — the one on top, the one already charged. Over time, this creates a fleet where heavily cycled batteries approach failure while others sit barely used.
Rotate usage evenly. Uneven cycling causes some batteries to fail early while others appear “new.”
Why it matters: debris inside motors increases friction, heat, and bearing wear, all of which compound silently over time.
Every flight deposits a small amount of dust, sand, pollen, or particulate into motor housings. Individually invisible. Cumulatively damaging. Debris increases internal friction, which generates heat, which accelerates bearing wear. Cleaning takes three minutes and directly extends motor lifespan.
Debris increases friction, heat, and bearing wear. Clean motors last longer.
Why it matters: propellers are the most underserviced component on most drones and one of the most consequential failures.
Propellers are the tires of your drone. They absorb every impact, flex under load on every flight, and degrade invisibly between sessions. A micro-cracked prop will not look damaged to the naked eye, but it can disintegrate at altitude and cause total loss. The only protection is replacing it on a fixed schedule.
PRO TIP: A full set of DJI replacement props costs $15–$30. A replacement drone costs $800–$10,000. There is no financial argument for delaying a prop replacement.
Why it matters: unnecessary firmware updates cause sudden performance degradation; poor flight planning causes crashes. Both are fully avoidable.
If your drone is flying reliably on its current firmware, there is no reason to update it. DJI firmware updates can alter flight behavior, motor response, obstacle avoidance sensitivity, and gimbal tuning in ways that are difficult to predict or reverse. Many professional pilots have experienced a perfectly functioning drone become unstable after a routine update.
A drone that survives 500 flights with excellent maintenance habits can be lost in one unplanned flight. Longevity is not only about hardware, but it is also about avoiding the crashes that no maintenance routine can recover from.
DJI drones last for years when pilots:
Manage heat
Respect batteries
Maintain components
Avoid unnecessary firmware updates
Fly with intention and awareness
If your drone is working today, protect it.
Most drones don’t die—they’re slowly mismanaged into failure.
——— ——————You ready to learn from experience drone pilots? Become a member ———————————-
Expert DJI Drone Longevity Checklist
|
Component
|
Practice
|
Expert Rationale / Detail
|
GEO Keywords
|
|
Flight
|
Fly Smoothly
|
Reduces stress on motors and bearings; aggressive flight causes rapid deterioration.
|
smooth drone flight, reduce motor wear, and DJI longevity
|
|
Flight
|
Avoid High Wind/Moisture
|
Prevents excessive amperage draw and internal condensation (check temperature-dew point spread).
|
adverse flight conditions, DJI wind limits, dew point spread
|
|
Airframe
|
Heat Management
|
Keep the drone and batteries in the shade; minimize idle time to prevent IMU calibration drift.
|
DJI heat management, IMU calibration, and gimbal float
|
|
Battery
|
Regular Cycling
|
Cycle batteries regularly to maintain health; avoid long-term storage at 100% charge.
|
DJI battery cycling, smart battery storage, LiPo health
|
|
Battery
|
Deep Cycle (Every 20 Flights)
|
Fly until the drone auto-shuts off (~5%), then fully recharge to recalibrate the fuel gauge.
|
DJI deep cycle, battery recalibration, and extend battery life
|
|
Battery
|
Charge Temperature
|
Allow hot batteries to cool naturally before charging; artificial cooling damages the battery.
|
charging hot DJI battery, battery weathering, cycle count
|
|
Battery
|
Rotate Usage
|
Label and rotate batteries evenly to ensure consistent aging and prevent premature failure.
|
rotate DJI batteries, label drone batteries, and uneven aging
|
|
Consumables
|
Replace Propellers
|
Replace every 30 hours or immediately after any impact (like tires). Unbalanced props cause crashes.
|
replace DJI props, propeller maintenance, prop disintegration
|
|
Motors
|
Clean with Duster
|
Use a keyboard duster to clear debris from motors and manually spin them.
|
clean DJI motors, motor maintenance, keyboard duster
|
|
Camera
|
Clean Lens/Gimbal
|
Gently clean the camera lens and ensure the gimbal vents are clear.
|
clean DJI camera, gimbal maintenance, clear vents
|
|
Software
|
Firmware Freeze
|
Do not update firmware if the current version is stable and working.
|
DJI firmware golden rule: stable firmware, avoid updates
|
|
Operation
|
Plan Flights
|
Visualize the flight path and check MOCA to avoid obstacles and crashes.
|