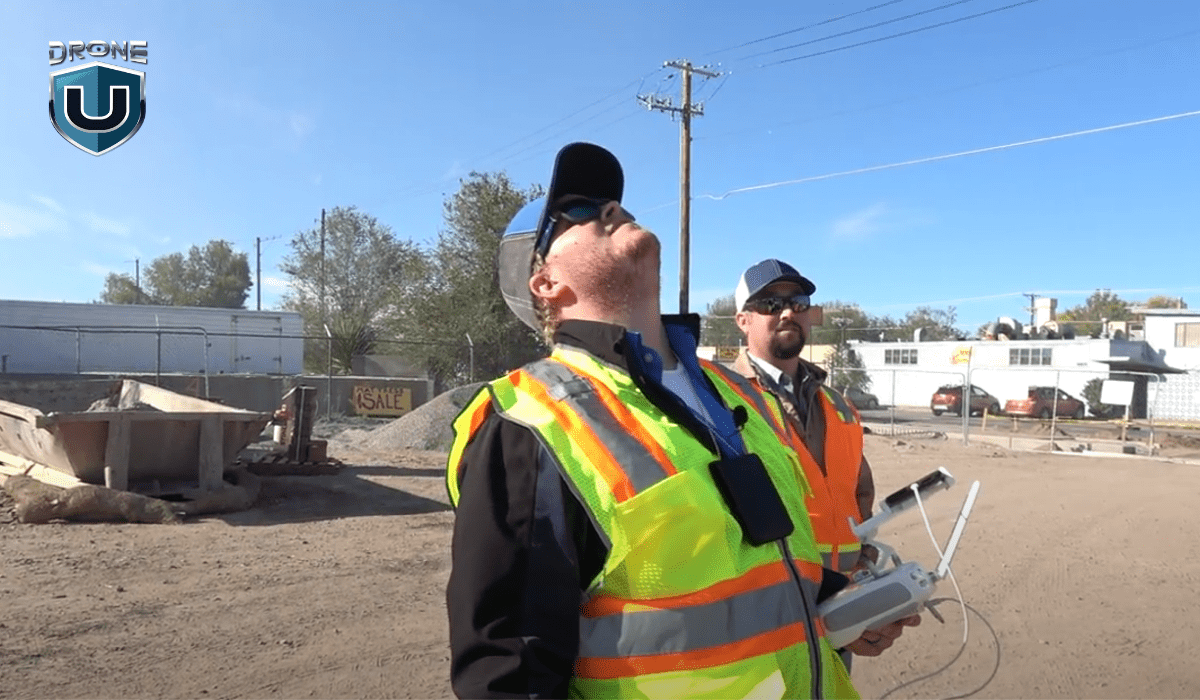
Top 5 Drone Flying Mistakes New Pilots Should Avoid for a Smoother Flight
You unbox your drone. The battery is full. The sky is clear. You pick an open field and hit the launch button.
For a few seconds, everything feels perfect. You’re flying.
Then something goes wrong.
The drone starts drifting. The controls don’t respond. A warning pops up on the screen. Seconds later, the battery dies, and your drone drops out of the sky.
That’s how most new pilots learn.
While this might appear to be carelessness, it ultimately stems from the inexperience of new pilots and their unfamiliarity with knowing what to watch out for.
In this guide, you’ll learn the five most common mistakes beginner drone pilots make in the U.S. Each one comes with a simple fix that can save you from crashes, lost drones, and frustrating flight days.
Let’s get started.
Mistake #1: Skipping Pre-Flight Checks
You’re excited to fly. You power up your drone, hear a few beeps, and your thumb’s already hovering over the launch button.
But rushing into the air is how most new pilots create the conditions for failure.
It’s easy to underestimate how much can go wrong before your drone even takes off.
Loose propellers, weak GPS signal, a low battery, outdated firmware, and other minor issues can have a compounding effect, and once you’re airborne, it’s often too late to fix them.
What can go wrong
Skipping pre-flight checks can lead to:
- The drone drifting or failing to hover
- GPS signal dropping mid-flight
- Sudden battery drain or forced emergency landings
- Glitches in Return-to-Home behavior
- Trouble with local airspace rules or outdated software
Most of these problems don’t leave room for adjustments. You either catch them on the ground or you deal with them in the air.
How to avoid it
Slow down and check your setup before every flight. Here’s a basic pre-flight checklist for beginners:
- Battery charged and healthy (drone + controller)
- Propellers secure and undamaged
- GPS signal locked
- Compass and IMU calibrated if needed
- Return-to-Home set with safe altitude
- Firmware and flight app updated
- Flight area clear of people, trees, and interference
Running through this checklist takes just a few minutes, but it can save you from hours of frustration and expensive mistakes.
Over time, it’ll become second nature. Until then, take it slow and be thorough.
Even with everything set up perfectly, things can still go wrong, especially when the weather doesn’t play nice. Let’s talk about that next.
Mistake #2: Underestimating Weather and Environmental Conditions
You might glance up, see clear skies, and assume it’s a perfect day to fly.
But drone weather isn’t just about blue skies; it’s about wind, humidity, temperature, visibility, and even what’s around you on the ground. If you’re not checking those things, you’re flying blind.
Even a light breeze at ground level can intensify into heavy wind just 50 feet up. If your drone isn’t built to handle it, you’ll find yourself fighting for control—or watching it drift away faster than you can react.
What can go wrong
Flying in poor conditions can cause:
- The drone to drift, struggle to return, or hover unevenly
- Battery life to drop faster than expected, forcing emergency landings
- GPS or compass interference from nearby power lines, buildings, or metal objects
- Sudden signal loss in areas with strong radio or magnetic interference
- Water damage from flying through light rain or heavy humidity
- Poor visibility due to glare or fog making it hard to keep a line of sight
Even bright sunshine can be a problem if the glare hits your screen and you can’t see your controls.
These aren’t rare scenarios; they happen all the time, especially to new pilots who don’t check the environment before taking off.
How to avoid it
Before every flight, take a minute to assess the conditions around you:
- Check wind speed: Stay below your drone’s rated wind resistance (usually 10–20 mph for beginner drones). Use apps like UAV Forecast or Windy.
- Watch for precipitation and humidity: Never fly in rain or heavy moisture, even if it’s light mist.
- Avoid extreme temperatures: Cold weather can quickly drain batteries, and extreme heat can damage internal parts.
- Check visibility and glare: Wear sunglasses or use a screen hood if needed. Always maintain a clear visual line of sight.
- Stay clear of interference: Avoid flying near power lines, large metal structures, radio towers, or even parked cars with large metal surfaces.
- Choose open areas: Pick spots with minimal trees, buildings, or other obstacles that could block signals or cause accidents.
- Plan a backup landing spot: Always know where your drone can safely land if you suddenly lose control or connection.
The weather can shift quickly, and the air up there isn’t always the same as down where you’re standing. If you want smooth flights, never skip this part.
Next, let’s talk about another mistake that can cost you big.
Mistake #3: Ignoring Regulatory and Airspace Rules
It’s easy to assume you can fly your drone wherever the skies are clear.
But in the U.S., the airspace is regulated, and if you’re not paying attention, you could break the law without even realizing it.
Many new pilots are unaware of the drone regulations, or worse, skip checking airspace restrictions altogether. The FAA has clear limits on where and how you can fly, and ignoring those can land you in serious trouble fast.
What do all the different airspace classes mean? Check out our Guide to Class Airspace for a simple breakdown of what you can and can’t fly in.
What can go wrong
Flying without understanding the rules and regulations can lead to:
- Entering restricted or controlled airspace, especially near airports
- Flying above 400 feet, where manned aircraft operate
- Losing the visual line of sight, which is a legal requirement
- Endangering people, property, or aircraft
- Facing fines, penalties, or having your drone confiscated
How to avoid it
Before every flight, take a few minutes to fly smart and legally:
- Register your drone with the FAA if it weighs more than 0.55 lbs
- Use apps like B4UFLY or Airmap to check for airspace restrictions nearby
- Always keep your drone within your visual line of sight
- Fly below 400 feet above ground level
- Avoid flying near airports, heliports, or other restricted zones
- Learn and follow local drone laws, which can differ by state or city
Following the rules keeps you legal and safe. But even the best pilots make mistakes during flight.
Next, we’ll discuss losing focus while flying and how it can lead to accidents.
Mistake #4: Poor Control and Spatial Awareness
Flying a drone isn’t just about moving joysticks. It’s about knowing exactly where your drone is in space, how it’s behaving, and what’s around it.
When you’re just starting, it’s easy to lose track. You might fly too far, go too high, or become disoriented when your drone is facing you instead of away. That’s when mistakes happen.
Suddenly, you’re fighting to figure out which way is forward. You can’t tell how close you are to a tree. Or worse, you completely lose sight of the drone and have no idea where it’s headed.
What can go wrong
Lack of control or awareness in flight can lead to:
- Crashing into trees, buildings, or obstacles you didn’t see in time
- Flying out of your visual line of sight (which is against FAA rules)
- Misjudging your speed or distance, especially when flying far or high
- Getting confused when flying backward or when the orientation flips
- Damaging or completely losing your drone in a flyaway
This usually happens because your brain becomes overwhelmed, especially when trying to film, avoid obstacles, and steer at the same time.
How to avoid it
Here’s how to actually build spatial awareness and flight control that you can trust:
- Fly in wide, open areas at first: Don’t start near trees, rooftops, or tight spots. The more space you give yourself, the more you can focus on learning movement and orientation.
- Keep your drone in your line of sight: It’s not just a rule to follow. It’s how you stay aware of your drone’s direction, distance, and altitude. If you can’t clearly see it, you’re not really in control.
- Practice orientation, not just movement: Many beginners panic when the drone is facing them, because left becomes right and forward becomes backward. Practice flying in all directions and from different angles until it feels natural.
- Simulate loss-of-signal scenarios: Manually trigger Return-to-Home (RTH) to learn exactly what your drone does – how high it climbs, how it returns, how it lands.
- Learn your drone’s momentum: Drones don’t stop on a dime. The faster you’re moving, the longer it takes to slow down or change direction. Start slow, and feel how long it takes to stop when descending or turning.
- Know your sensors, but don’t rely on them: Obstacle avoidance is great until it isn’t. Practice flying as if your sensors don’t exist. That way, if they fail, you’re still in control.
Mastering control takes practice, but the next mistake happens when pilots skip important flight planning. Let’s dive into that.
Mistake #5: Skipping Flight Planning
It’s tempting just to grab your drone and take off, especially when you’re excited. However, flying without a solid plan can lead to nasty surprises, unsafe situations, or missed opportunities to capture the perfect shot.
Without thinking ahead, you might accidentally fly into restricted airspace, drain your battery mid-flight, or crash into something you didn’t see coming.
What can go wrong
When you skip flight planning, you’re opening the door to problems like:
- Running out of battery while still in the air
- Accidentally entering no-fly zones or restricted areas
- Crashing into unexpected obstacles (trees, power lines, buildings)
- Missing the moment or failing to complete your planned shoot
- Losing track of your drone or struggling to find a safe place to land
How to avoid it
Before every flight, take a few minutes to plan. It doesn’t take long, but it makes a huge difference in how smoothly things go.
Here’s what you should do:
- Research your location: Check for airspace restrictions, nearby obstacles, or sensitive areas
- Review the weather and lighting: Avoid poor visibility or sudden changes that could affect flight
- Plan your route: Know your takeoff point, flight path, and where you’ll land
- Check your gear: Make sure your drone and controller are fully charged and functioning
- Communicate: If you’re in a public space, let people nearby know you’re flying
- Have a backup plan: Think ahead about what you’ll do if the weather shifts or something goes wrong
Just a bit of planning goes a long way. You’ll avoid headaches, protect your gear, and actually get the shots you want.
Wrapping Up
Avoiding common drone mistakes demands more than piloting skills. It requires flying with purpose, control, and confidence.
Every flight is a chance to improve, but that only happens when you’re prepared, aware, and intentional with every move.
Flying drones is about knowing your gear, understanding the environment, and respecting the rules.
When you plan your flights, check your equipment, and stay alert, you avoid costly errors and you get better results.
Want to speed up your learning curve?
Our Drone Pilot Training teaches you everything from basic controls to advanced flight techniques. It’s hands-on, practical, and built for real-world flying.

How to Choose the Best Drone for Cinematic Filmmaking
Ever wondered what separates breathtaking aerial footage from just another drone video online? The secret lies not only in honed flying skills, but also in selecting the best cinematic drone for capturing the moment.
Imagine flying over a mountain range just as the sun is setting, bathing everything in warm, soft light. Your drone captures stunning, detailed footage that looks like it belongs on the big screen. That’s the magic of cinematic drone filmmaking.
In this guide, we’ll explore what makes footage truly cinematic, identify the key drone features, and guide you on how to choose the right drone for your style and budget. We’ll also cover must-have accessories and key legal considerations to help you fly safely and confidently.
Let’s first understand what cinematic-quality footage really means.
Understanding Cinematic Filmmaking Needs
Before choosing the best cinematic drone, you need to know what “cinematic” means.
In the context of drone filmmaking, ‘cinematic’ means capturing footage or shots that feel smooth, intentional, and visually immersive. For example, imagine a slow fly-through over a forest at sunset, where golden light streams through the trees, slowly revealing the scene.
It’s the kind of footage that draws viewers into the story rather than simply showing them an aerial view.
To achieve such shots, your drone setup needs three things working together:
1. Stability and Smooth Motion
To capture stunning aerial shots, your drone needs to fly smoothly. Nothing ruins a shot faster than shaky or jerky footage. You need a strong, reliable gimbal to keep your camera steady, even during harsh wind, so every movement feels planned.
2. Dynamic Range and Color Depth
Professional filmmakers need flexibility in post-production to match the look of other cameras. Drones that shoot in flat profiles, such as D-Log or RAW, capture more detail in the bright and dark areas of your image. This means you can adjust colors, shadows, and highlights in post-production to give your footage a cinematic polish.
3. Precise Control Over Composition
Cinematic shots rely on deliberate motion, such as slow reveals, orbit shots, and buttery-smooth tracking. The best drones provide precise control over flight speed, gimbal tilt, and camera angles. That means you can choreograph or plan your shots with intention rather than just flying aimlessly.
Before making any decision, consider your projects: Are you shooting commercials, indie films, or travel films? Your answer will help determine which features matter most and guide you toward the drone that best suits your workflow.
Next, let’s break down the key features to look for when choosing the best cinematic drone.
Must-Have Features For True Cinematic Drones
Choosing the best cinematic drone comes down to balancing camera quality, flight performance, and creative control. Simply picking the most expensive model won’t guarantee the cinematic results you’re looking for.
Here are some key factors to consider while comparing options:
1. Camera Specifications
Start with a 4K resolution camera. Choose one with a 1-inch sensor or larger for sharper details and better low-light shots.
Check the frames too. 24fps gives a classic cinematic feel, while 60fps or more is great for smooth slow motion.
2. Gimbal Stabilization
Use a drone with a three-axis gimbal. It keeps your footage smooth during quick movements and in windy conditions. Some professional drones allow swapping lenses or using dual-operator mode. In dual-operator mode, one person flies the drone while the other controls the camera for perfect framing.
3. Flight Performance
Choose a drone that is stable and responsive in challenging conditions to capture intricate shots, even in changing weather conditions. Look for at least 20-30 minutes of flight time so you can capture more shots without constant battery swaps.
4. Intelligent Flight Modes
Use features like ActiveTrack, Point of Interest, and Waypoints to create complex shots. These tools are invaluable if you film solo and need the drone to follow or orbit your subject automatically.
With these key features in mind, it’s time to explore the top cinematic drones of 2025, carefully selected to help you capture professional-grade, film-quality footage.
Top Recommended Drones for Cinematic Filmmaking (2025)
Now that you know what to look for and how much to spend, here are the best drones of 2025 that deliver truly cinematic results. Each one includes key specs, standout features, and pros and cons so you can quickly find the drone that matches your needs.
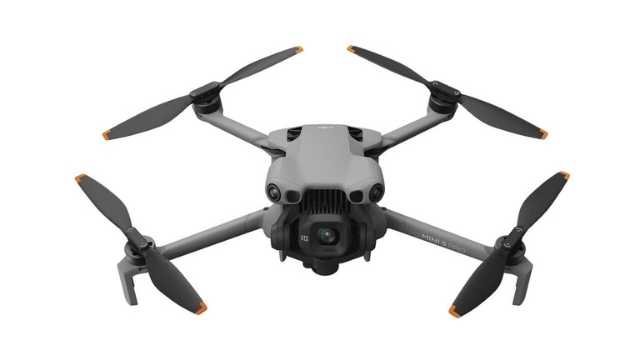
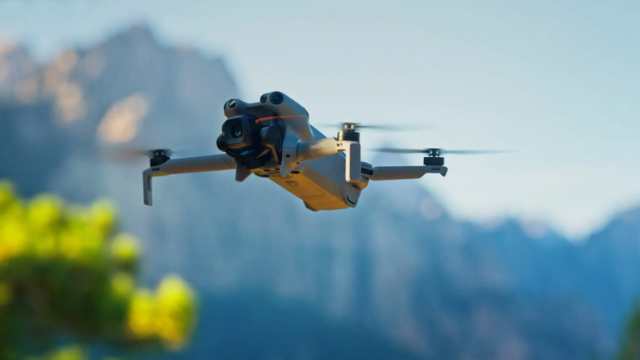
1. DJI Mavic 4 Pro
Source: DJI
The DJI Mavic 4 Pro is the newest flagship drone in DJI’s Mavic line. Its triple-camera system, which includes a 100 MP 4/3 CMOS Hasselblad sensor along with medium telephoto and telephoto lenses, provides a wide range of focal lengths for creative control. It lets you capture everything from sweeping landscapes to tight cinematic shots, all without changing drones.
The Mavic 4 Pro records up to 6K/60 fps HDR video, so every shot looks sharp and detailed. The new Infinity Gimbal offers 360° rotation for capturing creative angles and movements. Features like omnidirectional obstacle sensing and forward-facing LiDAR assistance make flying safer, even in low-light conditions.
Key Features & Specs:
- 100 MP 4/3? Hasselblad camera + triple-lens system
- 6K/60 fps HDR video + 4K/120 fps slow motion
- Infinity Gimbal with 360° rotation
- Up to 51minutes of flight time
- Omnidirectional obstacle sensing + LiDAR assist
- O4+ transmission for better range and data speeds
| Pros | Cons |
|
|
2. DJI Air 3S
Source: DJI
The DJI Air 3S is a compact yet versatile drone designed for creators who value flexibility and portability. It features dual cameras, a 1-inch primary sensor, and a 70mm medium telephoto lens, giving plenty of creative options. It records 4K video at 60fps with a 10-bit D-Log m color profile, capturing professional and color-rich aerial footage. This makes it an excellent choice for creators who want a versatile drone capable of handling extended shoots and capturing smooth, cinematic footage.
Omnidirectional obstacle sensing helps the drone avoid collisions, keeping your flights safe and stress-free. With a 45-minute flight time, you can stay in the air longer and capture more shots before recharging.
Key Features & Specs:
- Dual cameras (1-inch CMOS + 70mm medium telephoto)
- 4K/60fps HDR video + 10-bit D-Log M color profile
- 14 Stops of Dynamic Range enhance the visual depth of the footage
- Free Panorama mode for seamless panoramic shots
- Up to 45 minutes of flight time
- Nightscape omnidirectional obstacle sensing
- Next-Gen smart RTH
- Provides a maximum transmission range of up to 20km
| Pros | Cons |
|
|
For a full hands-on review and detailed guide of the DJI Air 3S, check out our dedicated article DJI Air 3S Review: The Mid-Range Drone That Nails It (Mostly).
3. DJI Mini 4 Pro

Source: DJI
The DJI Mini 4 Pro is a lightweight drone under 249g, making it perfect for travel filmmakers and solo creators. Despite its compact size, it records 4K/60fps HDR video for high-quality cinematic footage. Its ActiveTrack 360° feature lets the drone follow subjects smoothly from any direction.
Omnidirectional obstacle sensing and Advanced Pilot Assistance Systems (APAS) enable the drone to avoid obstacles, ensuring safer flights in complex environments. With a 34-minute flight time and long-range FHD transmission of up to 20km, this drone makes capturing dynamic shots easy without the need for heavy gear.
Key Features & Specs:
- <249g weight (no FAA registration required in many countries)
- 4K/60fps HDR video
- Equipped with a 1/1.3″ CMOS sensor and an f/1.7 aperture
- Supports 10-bit D-Log M and HLG color modes
- 34-minute flight time
- Omnidirectional obstacle sensing
- Automatically rotates the camera to capture vertical footage
| Pros | Cons |
|
|
4. DJI Mini 5 Pro (Just Released)
Source: DJI
The DJI Mini 5 Pro is the newest and most advanced Mini drone. It uses a larger 1-inch sensor for better low-light performance and sharper detail. It shoots 4K/120fps slow-motion video and produces richer colors with improved HDR.
DJI equips this model with forward-facing LiDAR and upgraded obstacle sensing, enabling it to fly more safely in complex environments. Flight time is slightly longer, with up to 36 minutes on the standard battery and even more with the Plus battery. The redesigned gimbal now allows for a 225° rotation, making vertical shots easy. The Mini 5 Pro is ideal for creators who need portability without sacrificing image quality.
Key Features & Specs:
- 1-inch CMOS sensor with 50 MP stills
- 4K/120 fps slow-motion + improved HDR
- Omnidirectional obstacle sensing + LiDAR
- 36-minute flight time (52 minutes with Plus battery)
- 20 km FHD transmission + larger internal storage
- 225° gimbal roll for vertical shooting
| Pros | Cons |
|
|
5. Autel EVO Lite+
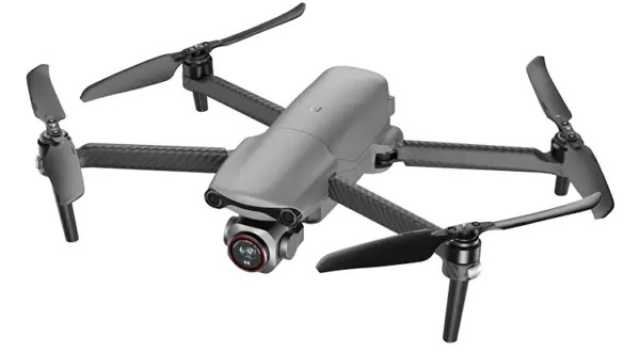
Source: Autel Drones Baltic
Autel EVO Lite+ is a reliable alternative to DJI drones for creative shooting. Its 1-inch sensor and adjustable aperture (f/2.8–f/11) give you control over exposure and depth of field. It also records sharp 6K video at 30fps, and Autel’s Moonlight Algorithm 2.0 improves performance even in darker scenes.
Autel’s ultra-wide-angle obstacle avoidance and SkyLink transmission ensure safe, long-range flights up to 7.4 miles (?12 km). It performs well in low light, making it great for golden-hour (i.e., sunset and evening) shoots.
Key Features & Specs:
- 1-inch CMOS sensor with adjustable f/2.8–f/11 aperture
- 6K video at 30fps
- Offers up to 40 minutes of flight time
- Moonlight Algorithm 2.0 for low-light shooting
- offers a 150° front field of view, reducing blind spots and enhancing safety during flight
- Includes automated flight modes such as Rocket, Orbit, Flick, and Fade Away
| Pros | Cons |
|
|
6. DJI Inspire 3
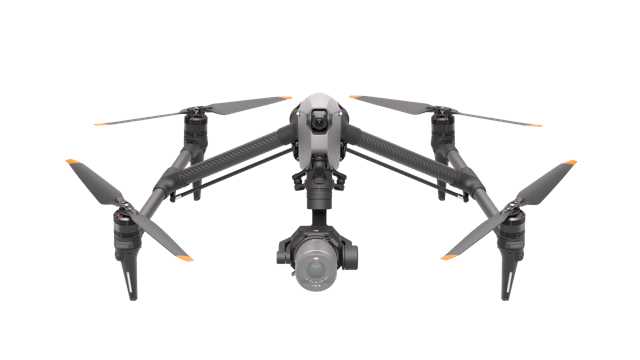
Source: DJI
The DJI Inspire 3 is designed for professional film production. It records full-frame 8K ProRes RAW video for the highest image quality available in a drone. You can swap lenses using the DL mount to get the perfect look for your scene.
The dual-operator control allows one person to fly while another handles the camera, making complex shots easier to capture. RTK precision positioning keeps flights stable and accurate, even for demanding aerial sequences. While the drone is large and requires setup time, it is ideal for professional crews who need top-tier performance.
Key Features & Specs:
- Records up to 8K/75fps in Apple ProRes RAW and 8K/25fps in CinemaDNG
- Dual-operator control (pilot + camera op)
- Supports DJI’s DL-mount lenses, including 18mm, 24mm, 35mm, 50mm, and 75mm options
- Features O3 Pro video transmission with a maximum range of 15 km
- Supports live feeds up to 1080p/60fps
- Equipped with a 1/1.8-inch ultra-wide FPV camera offering a 161° field of view
- Offers up to 28 minutes of flight time
| Pros | Cons |
|
|
Each of these drones serves a different type of filmmaker, from solo travel vloggers to full production crews. The key is to choose the one that matches your shooting style, budget, and creative goals so you can focus on telling your story.
Best 6 Cinematic Drones: Side-by-Side Comparison Table
Here’s a side-by-side comparison table to help you make the right choice.
| Drones | Weight | Best for | Price |
| DJI Mavic 4 Pro | ~ 1063 g | Filmmakers looking for top-tier image quality and versatility | $2,049 – $3,239 |
| DJI Air 3S | ~ 724 g | Users who want travel usability with pro-level image & transmission | $1,029 – $1,469 |
| DJI Mini 4 Pro | < 249 g | Travel vloggers, solo creators, shoots where portability matters most | $629 – $949 |
| DJI Mini 5 Pro | 249.9 g | Content creators who want portability without compromising on performance | $739 – $ 1,129 |
| Autel EVO Lite+ | ~835 g | Those who shoot in challenging light/common golden-hour scenes | $1,149 |
| DJI Inspire 3 | ~516 g (Without lens) | Professional production teams, filmmakers needing max image quality & creative control | $11,810 |
Accessories That Elevate Your Cinematic Shots
The right accessories can take your footage from good to truly cinematic, saving time and money. Even minor upgrades, such as ND filters or extra batteries, can make your video look more professional.
Here are some of the accessories you may need for capturing stunning cinematic shots.
- ND Filters: Neutral Density (ND) filters control the amount of light that hits the camera sensor. This helps you keep the right shutter speed for smooth, natural motion blur, even in bright sunlight. Example: PolarPro and Freewell offer excellent ND filter kits for DJI drones.
- Extra Batteries: Running out of power mid-shot can ruin your footage. Carry extra batteries to keep filming without interruptions.
- Landing Pad: While you can find plenty of ways to land the drone safely, having a landing pad made for the task is a great way to protect the drone’s gimbal camera during takeoff and landing on irregular or hard surfaces.
- Propeller Guards: Prop guards add safety when flying near people or obstacles. They protect both your drone and the surroundings.
- Carrying Case: A good case or backpack keeps your drone, batteries, and accessories organized and safe. It also makes travel easier.
These tools help you achieve smoother shots, better colors, and consistently professional results, turning every flight into a chance to capture cinematic masterpieces.
Final Takeaway
Choosing the right cinematic drone isn’t about picking the most expensive model. It’s about finding the one that fits your filmmaking style, workflow, and budget.
Start by thinking about the kind of shots you want to capture. Consider whether you need portability for travel or professional-grade features for big productions.
Next, analyze camera specs, flight performance, and intelligent modes. Don’t forget about legal requirements and practical considerations, as knowing the rules keeps you safe and your footage usable.
Accessories like ND filters, extra batteries, and landing pads can elevate your results, so factor them into your planning.
Finally, review the top recommended cinematic drones for 2025 and compare them based on your priorities. Whether you’re a solo travel filmmaker or running a full production crew, the right drone will empower you to capture smooth, cinematic shots every time.
Ready to take your drone filmmaking to the next level?
Join Drone U today and get access to expert training, flight techniques, and insider tips to help you master your craft.

FAA Part 108 – Training and Certification for Professional Drone Pilots
Ever wondered what’s next after passing your Part 107 exam? As drone operations get more complex, with heavier equipment, BVLOS flights, and crowded skies, the FAA has introduced Part 108. This is a new framework designed specifically for professional drone pilots.
Part 108 is not just a set of new rules; it’s a step up in professionalism. It is reshaping how commercial drone operations are certified, trained, and managed. This regulation replaces outdated aviation rules with a system designed for modern, high-stakes drone missions. To fully understand Part 108, you must complete the training, earn advanced certifications, and run safer, more efficient drone operations under its guidance.
Whether you’re looking to expand your services or simply fly with confidence, Part 108 training helps you operate at the next level.
In this guide, we’ll break down what FAA Part 108 is, how the training and certification process works, and how you can prepare to stay compliant and competitive.
What is FAA Part 108?
FAA Part 108 is the Federal Aviation Administration’s new framework for regulating professional drone operations that go beyond the basic rules of Part 107.
While Part 107 opened the door for commercial drone use, Part 108 raises the bar. It accounts for more advanced, complex, and high-risk drone operations, especially those involving multiple drones, heavy payloads, or flights in controlled airspace.
At its core, Part 108 is built to make professional flying safer and more organized. It frames clear rules for both pilots and the companies they fly for, emphasizing accountability, structured training, and risk management.
Unlike Part 107, which only certified individual remote pilots, Part 108 recognizes that many drone operations now involve teams, multiple aircraft, and more complex missions. That’s why it introduces roles like Operations Supervisor and Flight Coordinator.
These roles are similar to those of a flight crew in manned aviation but are designed specifically for drone operations.
Here’s a side-by-side comparison of Part 108 and Part 107 (the rules most commercial pilots are already familiar with):
| Aspects | Part 107 | Part 108 |
| Scope of Operations | Covers small drones (under 55 lbs) for basic commercial use. Usually limited to simpler missions such as photography or mapping in uncontrolled airspace. |
Expands to more complex missions. Especially for multiple drone missions, heavy equipment, BVLOS flights, and work in controlled or busy airspace. |
| Focus | Individual remote pilot certification. | Team-based operations with defined roles for Operations Supervisor and Flight Coordinator. |
| Training & certification | One-time knowledge test for pilots; No organizational training required. |
Structured training programs, formal certification for pilots and supervisors, and ongoing compliance checks. |
| Safety Requirements | Basic operational rules (VLOS, daylight ops, etc.). | Mandatory Safety Management System (SMS), documented SOPs, and risk mitigation strategies. |
| Oversight | Limited oversight: The pilot independently self-regulates flights. | Organizational accountability with FAA-reviewed procedures and compliance documentation. |
Part 108 Training and Certification
Flying drones professionally isn’t just about knowing how to take off and land. It’s about flying safely, smartly, and within the rules. That’s exactly what Part 108 training is designed for.
Unlike Part 107, which is primarily a one-time knowledge test, Part 108 gives you structured training. It combines hands-on skills, theory, and practical experience in operating within an organization.
How Authorization Works (Two-Tier System)
Part 108 uses a two-step process to ensure both the company and its pilots are ready for advanced drone operations.
1. Operator Permits
If you want to run more advanced operations, you need a Part 108 permit. To get one, you must show the FAA that you have:
- Clear Standard Operating Procedures (SOPs)
- A working Safety Management System (SMS)
- Plans to identify risks and prevent accidents
2. Pilot Certificates
As a pilot, you need to complete Part 108 training and earn a certificate that proves you can:
- Fly drones safely under Part 108 rules.
- Understand airspace rules and restrictions.
- Follow emergency and contingency procedures.
Key takeaway: Permits handle organizational readiness, while certificates ensure individual pilot competency.
Once your organization and pilots have the proper permits and certificates, these approvals define which missions you can legally fly and under what conditions. In other words, they directly determine the scope, limits, and complexity of the operations you’re allowed to conduct.
Types of Operations Allowed (Permitted vs. Certificated Operations)
Once your organization and pilots are approved, you can fly drones under two categories: Permitted Operations and Certificated Operations. Understanding the difference helps pilots and organizations plan missions safely, especially for BVLOS (Beyond Visual Line of Sight) flights.
[Note: Part 108 operations are currently a proposed rule and not yet final. Some details may change before the FAA issues the final regulations.]
1. Permitted Operations (Subpart D)
These operations are designed for lower-risk, more controlled missions like
- Package delivery with drones under 55 lbs
- Aerial surveying
- Agricultural work
- Demonstrations or civic interest projects
- Training flights
Each operation has specific limits on weight, fleet size, and destinations to keep operations safe and manageable.
For example, if you’re delivering small packages in a city, a permit ensures you follow population density rules and avoid flying in restricted airspace.
2. Certificated Operations (Subpart E)
The certified operations cover high-risk or complex missions. You can
- Fly heavier drones (up to 110 lbs for deliveries)
- Manage larger fleets
- Carry hazardous materials with extra authorization
Certification ensures both the organization and pilots have the proper training, procedures, and risk management systems in place.
For example, if you’re running multiple drones over a busy facility, a certificate ensures everyone knows their role and can operate safely.
In short, permitted operations are for running simpler, low-risk missions safely. On the contrary, certificated operations give you more freedom but demand more preparation and responsibility. Understanding the difference is crucial if you want to scale your operations or fly in more challenging environments.
What You’ll Learn in Part 108 Training
A solid Part 108 training program covers:
- Rules and Regulations: Understand FAA rules, airspace classes, and requirements for compliance
- Operational Skills: Learn to plan missions, check your drone, and manage payloads
- Risk Management & Safety: Use a Safety Management System (SMS) to identify hazards and prevent accidents
- Team Roles: If you’re an Operations Supervisor or Flight Coordinator, you’ll learn how to oversee missions and keep everyone coordinated
Why This Training Matters
Proper Part 108 training isn’t just about compliance. It provides you with tools to handle emergencies, operate in high-risk environments, and scale operations professionally.
For example, imagine you’re running a drone inspection company. You have multiple heavy-lift drones flying over an industrial site. Without Part 108 training, you may miss critical risk factors, which can lead to accidents or regulatory penalties. With proper training, you’ll learn how to plan each mission and communicate roles clearly with your team.
For a deeper dive, check out DroneU’s podcast on Part 108 for expert insights on rules, training, and flying professionally.
Now that you understand how Part 108 training works, let’s unpack what the FAA expects from you and your team.
Key Requirements for Drone Operators
FAA Part 108 doesn’t just regulate pilots; it sets clear rules for the organizations and operators managing drone missions. Here’s what you need to follow:
1. Operational Requirements
To meet Part 108 standards, you must follow strict operational rules that go beyond Part 107. These include:
- Flight Planning: You need to plan each mission carefully. Check airspace restrictions, monitor the weather, and think through any potential hazards.
- Authorized Airspace: Part 108 allows you to fly in more complex airspace, including controlled areas, but only if you have proper authorization.
- Operational Limits: Pay attention to weight restrictions, altitude ceilings, and line-of-sight rules. These are in place to keep you and everyone around you safe.
2. Airworthiness Standards
Every drone you fly under Part 108 must meet airworthiness standards, meaning it’s safe to fly and won’t put people or property at risk. As such, you need:
- Routine maintenance checks and inspections.
- Documentation of any repairs or upgrades.
- Ensuring all drones are safe for commercial operations, especially for high-risk tasks such as industrial inspections or drone deliveries.
3. Defined Team Roles
Part 108 introduces formal roles to professionalize drone operations:
- Operations Supervisor: Oversees the entire mission, ensuring safety and regulatory compliance, as well as crew coordination.
- Flight Coordinator: Manages flight logistics, monitors environmental conditions, and communicates with team members or air traffic control if needed.
Following these rules ensures that your operations run safely, consistently, and professionally while demonstrating to your clients that they can trust you.
Conclusion
FAA Part 108 marks a significant step forward for professional drone pilots. It goes beyond Part 107 and provides a structured, accountable framework for handling advanced drone operations. Learn the rules, complete your Part 108 training, and earn your certifications so you can fly safely, efficiently, and in full compliance.
Following Part 108 isn’t just about avoiding penalties; it helps you build credibility, expand your operational capabilities, and succeed in every mission. Whether you’re inspecting industrial sites, filming high-quality cinematography, or managing multiple drones, Part 108 equips you with the knowledge, skills, and operational oversight to handle complex missions confidently.
If you haven’t started your Part 108 training yet, now is the time. Earn your certification and fly with confidence, professionalism, and complete control over every mission.
Check out all DroneU’s courses to get started today and take your drone operations to the next level.
Best ND Filters for Drone Videography: Top Brands & How to Use Them
Have you ever watched your drone footage and felt like something was… off? Maybe it looked too sharp, too jittery, or just didn’t have that smooth, cinematic motion you see in professional aerial videos.
The problem usually isn’t your drone. It’s your shutter speed, and that’s exactly where ND filters come in.
Think of ND filters like sunglasses for your drone’s camera. They reduce brightness, help you control exposure, and lock in the right shutter speed. This gives your video that natural motion blur that looks professional and cinematic.
This guide isn’t about general ND filters or photography tips. It’s made for drone videographers.
Whether you’re flying a DJI Mini 4 Pro, Mavic 3, or anything in between, you’ll learn which ND filters to use for better video quality and how to choose the right ones based on lighting and frame rate.
If you’re tired of getting “okay” drone footage and want to level up to cinematic video, you’re in the right place.
Let’s get started.
Quick Primer: What ND Filters Do in Videography
If you want your drone videos to look cinematic, follow the 180-degree shutter rule.
This means your shutter speed should be about twice your frame rate. So if you’re shooting at 24fps, aim for a shutter speed of 1/50.
But in bright outdoor conditions, your camera will often overexpose the image at those slower shutter speeds. That’s where ND filters play a major role.
By reducing the amount of light hitting the sensor, ND filters let you stick to the correct shutter speed without blowing out your highlights.
The result is more natural motion blur and smoother footage, especially during pans, tilts, or fast movement.
What do you need to consider when buying ND Filters? Let’s explore that next.
Key Considerations When Choosing ND Filters for Drone Videography
Before buying ND filters for your drone, it’s important to understand how they actually affect your video footage.
The right filters help you capture smoother, more cinematic shots. The wrong ones can introduce unwanted issues such as color distortion, flickering, or overexposure.
Here are the key considerations:
1. Fixed ND vs Variable ND Filters
The first thing to understand is the difference between fixed ND filters and variable ND filters.
Fixed ND filters are available in set strengths like ND8, ND16, or ND32. These are the most reliable for drone videography. They offer consistent results and maintain image quality.
Variable ND filters, on the other hand, let you adjust the light reduction by rotating the filter. This is great for handheld cameras, but not for drones.
Most drone lenses are wide-angle, and variable filters can cause issues like vignetting or uneven exposure.
That’s why most professionals stick to fixed NDs when flying drones.
2. ND vs ND/PL
As you explore drone filters, you’ll likely find two main types: standard ND filters and ND/PL filters.
Both serve different purposes in drone videography, and choosing the right one depends on what and where you’re filming.
ND filters (Neutral Density) are used to control exposure by reducing the amount of light hitting the sensor.
Their main job is to let you maintain a slower shutter speed for proper motion blur, especially in bright conditions.
They’re simple, effective, and require no adjustment once mounted. These are ideal for general-purpose shooting in changing light or fast-paced environments.
ND/PL filters are hybrid filters that combine ND functionality with a polarizing element.
Along with reducing light, they also reduce glare and reflections from surfaces like water, glass, snow, or wet roads.
Polarization enhances contrast and color saturation, which can dramatically improve the look of reflective scenes.
However, there’s a trade-off.
To get the polarizing effect just right, ND/PL filters must be rotated to a specific angle before takeoff. This can be tricky because once the drone is in the air, you can’t adjust the angle.
Because of this limitation, ND/PL filters work best when you’re filming in a consistent direction.
For example, if you’re tracking a subject across a lake or flying over water, you can set the angle beforehand and get great results.
But they’re less ideal when lighting and angles change frequently, or when you’re flying spontaneously without time to prepare.
So, standard ND filters are a reliable choice when you need to move quickly without sacrificing exposure control.
3. Filter Strength
Next, you need to choose the right filter strength based on the lighting conditions.
For cloudy or low-light days, ND4 usually works best.
If you’re filming during golden hour or on an overcast afternoon, ND8 is a good option.
On a bright sunny day, ND16 gives you a balanced exposure while keeping your shutter speed in check.
For very bright conditions like beaches, snow, or direct midday sun, you may need ND32 or even ND64.
This is why most videographers use a small kit that includes several filter options to switch between as needed.
4. Compatibility with Your Drone
Make sure the filters you buy are compatible with your specific drone.
Different drones have different lens sizes and mounting systems.
Filters designed for the DJI Mini 4 Pro won’t fit a Mavic 3. Also, not all gimbals can handle heavy or poorly balanced filters.
Always choose filters that are made for your drone model to avoid issues during flight.
5. Build Quality Matters
Lastly, build quality matters more than you might think.
High-quality filters use multi-coated optical glass. These produce clearer images and maintain true color.
Cheaper filters can introduce unwanted color shifts or reduce sharpness.
Look for lightweight but durable frames, usually made from aluminum. This ensures they won’t interfere with your drone’s gimbal.
Finally, instead of buying individual filters, it’s usually better to go for a complete kit.
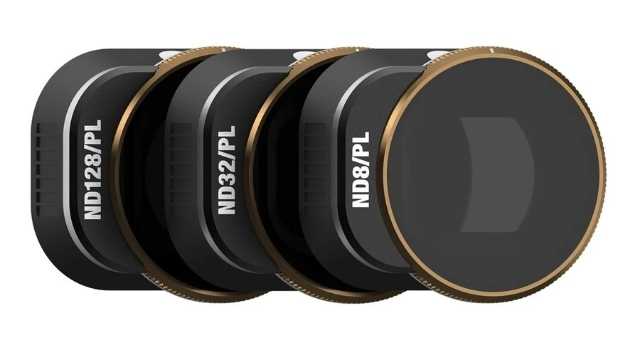
A well-rounded kit like an ND8/16/32/64 set gives you flexibility across different lighting conditions. It’s more cost-effective and saves you the guesswork when you’re out in the field.
Let’s explore the best ND Filter brands available in the market.
Best ND Filter Brands for Drone Videography
There are a lot of ND filter brands on the market. However, not all of them are built with drone videography in mind.
Some are designed for general photography or handheld cameras and don’t perform well in aerial shooting conditions.
Below are four trusted brands that offer reliable ND filters made specifically for drones. These are well-known in the drone community and tested by videographers around the world.
1. Freewell

Credit: Freewell
Freewell is one of the most popular choices among drone pilots. Their filters are well-built and offer solid optical performance at a reasonable price.
Most kits include both standard ND filters and ND/PL (polarized) versions. This gives you options for different lighting and shooting conditions.
The filters are lightweight and work well with DJI drones, including the Mini, Air, and Mavic series.
Pros:
- Good mix of quality and affordability.
- Includes both ND and ND/PL filters.
- Available for most DJI drone models.
- Positive feedback across drone communities.
Cons:
- Filter cases are bulky.
- Slight color shifts in certain lighting conditions.
2. PolarPro
Credit: PolarPro
PolarPro is a premium brand aimed at serious drone videographers. Their filters are built with cinema-grade glass and high-end coatings.
This results in sharp, clean footage with minimal color distortion.
They are more expensive than most brands, but many professionals consider them worth the cost.
The Vivid Collection, which includes ND/PL filters, is especially popular for its cinematic look.
Pros:
- Top-tier optical clarity and sharpness.
- Accurate color reproduction.
- Lightweight and durable build.
- Trusted by professional filmmakers.
Cons:
- Higher price point.
- Not available for every drone model.
3. PGYTECH
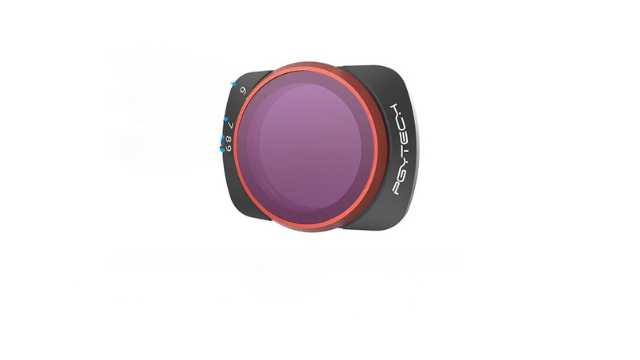
Credit: PGYTECH
PGYTECH is a solid choice for drone pilots on a budget. Their ND filters are affordable but still perform well enough for casual and semi-professional use.
They may not be as sharp as PolarPro or Freewell in all situations, but for most users, the difference is minimal.
They are lightweight, easy to install, and come with simple storage cases.
Pros:
- Budget-friendly.
- Decent optical performance for the price.
- Compatible with most DJI drones.
- Good option for beginners.
Cons:
- Slight color cast in some conditions.
- Not as sharp during fast motion or 4K video.
4. Tiffen
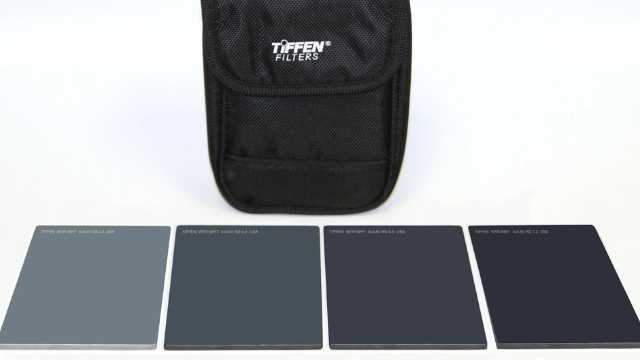
Credit: Tiffen
Tiffen is a well-known name in the film and broadcast industry. Their camera filters are used on Hollywood sets and professional productions worldwide.
They also make ND filters for drones, though the range is limited.
If your drone is supported, you’ll get excellent glass and professional-level results.
Pros:
- Outstanding optical quality.
- Trusted by industry professionals.
- Made in the USA with high standards.
Cons:
- Fewer drone models supported.
- Expensive compared to other options.
- Limited availability in kit form.
Always buy filters that are made for your specific drone.
Even the best filters won’t help if they don’t fit properly or throw off your gimbal balance. A snug, lightweight, and model-specific filter will always give you better results.
How to Use ND Filters in Drone Videography
ND filters can transform your drone footage, making it smooth, cinematic, and professional-looking.
However, achieving the best results requires knowing exactly how to use these filters in real-world shooting situations.
Here’s a step-by-step approach to help you master them.
1. Switch Your Drone to Manual Video Mode
The first step is to set your drone’s camera to manual video mode. This might be labeled as Pro mode or M mode, depending on your drone model.
Manual mode lets you control important settings like shutter speed and ISO yourself. This control is essential because automatic modes tend to pick very fast shutter speeds when shooting in bright conditions.
By switching to manual mode, you take full charge and prevent the drone from changing these settings mid-flight, which can lead to inconsistent results.
2. Set Your Frame Rate and Shutter Speed
Next, set your shutter speed to roughly double your chosen frame rate; this is known as the 180-degree shutter rule.
For example, if you’re shooting at 24 frames per second (fps), aim for a shutter speed around 1/50th of a second.
If you shoot at 30fps, use 1/60th of a second, and for 60fps, set your shutter speed to about 1/120th of a second.
This rule creates the natural motion blur that our eyes are used to seeing in film and video, giving your drone footage a smooth and cinematic look.
3. Perform a Pre-Flight Exposure Check
Before you take off, it’s crucial to do a quick exposure test with your chosen ND filter attached.
Look at your drone’s live video feed on the remote controller or your connected device.
If your drone supports it, turn on exposure tools like the histogram or zebra stripes. It helps you spot areas that might be overexposed or properly balanced.
If the image still looks too bright, swap in a stronger ND filter and check again.
Instead of adjusting your shutter or ISO to fix the exposure, use the filter to control the light coming into the lens. Think of the ND as a way to protect your cinematic settings, not as a fix for bad exposure.
Performing this simple step on the ground ensures you’re not wasting precious flight time capturing unusable footage due to improper exposure.
4. Set Polarizing ND Filters (ND/PL) Before Takeoff
If you’re using ND filters with a polarizing element, adjust the polarizing angle manually before takeoff.
These filters can reduce glare from water, roads, or glass and enhance contrast, but only if they’re set correctly.
Rotate the filter while watching the live feed, and stop when you see the reflections drop or the colors become richer.
Once the drone is in the air, that angle is locked, so get it right on the ground.
Using ND filters correctly is a simple step that dramatically improves your drone videos. You’ll get smooth motion blur, balanced exposure, and cinematic quality that stands out.
Conclusion
Mastering ND filters is a creative decision that separates average drone footage from truly cinematic work.
When you understand how to use these filters with intention, you gain control over motion, light, and visual tone for your video.
As with any aspect of drone filmmaking, consistency comes from process.
The more familiar you become with ND filters, the more naturally they’ll become part of your pre-flight setup.
And once they’re second nature, you’ll start noticing a real difference: smoother footage, more cinematic motion, and far fewer surprises when you get to the editing stage.
If you want to take a deeper dive into drone videography, check out these comprehensive drone courses.
The Ultimate Beginner’s Guide to Remote Control (RC) Drones (2025)
Ever looked up and watched a remote control drone zip across the sky, and thought, “I want to do that!”? You’re not alone! Flying drones is one of the most exciting hobbies today. It combines cool tech, creativity, and a whole lot of fun.
RC drones are more than just flying cameras; they’re advanced aerial tools that are reshaping many industries. They capture stunning photos and videos from the sky. They are also used for surveying land, inspecting construction sites, and monitoring infrastructure. Some drones are even used to deliver packages. Smart, versatile, and reliable, these drones have become essential for professionals across a wide range of fields.
This comprehensive guide is for anyone new to RC drones. We’ll explore the different types of RC drones, how they work, and how to choose the right one for your needs. You’ll also learn about the best models for beginners and practical tips for their applications and maintenance.
Ready to take off?
Let’s dive in and see how these remote-controlled wonders work!
First up, why remote control drones?
Impact of Remote Control Drones
Remote control drones are game-changers. They offer a safe, efficient, and affordable way to get things done.
Remember those stunning aerial photos or videos you see from crazy angles? Drones made them possible, capturing what was once unreachable without expensive equipment or putting professionals at risk.
Even in search and rescue missions, drones can quickly scan vast areas and access challenging locations.
Essentially, drones have revolutionized the way we approach various tasks and challenges.
Before moving forward, let’s discover the different types of remote-control drones.
Types of RC Drones
Remote control drones come in various shapes and configurations. Each is designed for specific applications. Here are some of the most common types:
1. Quadcopters

These drones have four rotors and are among the most popular and versatile types. They are suitable for various applications, including aerial photography, videography, and recreational flying.
| Pros | Cons |
|
|
2. Fixed-wing Drones
Fixed-wing drones resemble traditional aircraft, with wings and a fuselage. They are typically used for long-range missions, such as surveying and mapping, due to their efficient aerodynamic design.
| Pros | Cons |
|
|
3. Multirotor Drones
Multirotor drones have more than four rotors, usually six (hexacopter) or eight(octocopter). They are known for their stability and the ability to carry heavier cameras or equipment. They’re suitable for professional applications like inspection and cargo delivery.
| Pros | Cons |
|
|
4. Single-rotor Drones
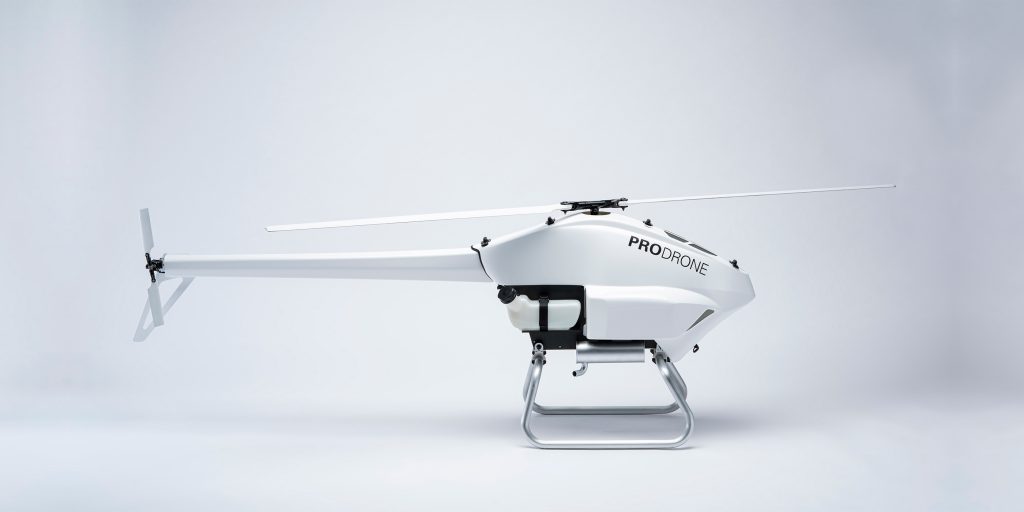 Credit: Prodrone
These drones mimic the design of traditional helicopters, with a single main rotor and a tail rotor. They are often used for specialized tasks like search and rescue operations or aerial filming in tight spaces.
| Pros | Cons |
|
|
Now, let’s understand how you can choose the perfect RC drone for yourself.
Choosing the Right Remote Control Drone
Your choice of a drone depends on your individual needs and preferences. The right model for you may not be the most expensive one, but the one that matches your skills and purpose. Here are the key factors to consider for choosing the right remote control drone:
1. Skill Level
Beginners can start with a stable, easy-to-control drone. Look for features like altitude hold, headless mode, and return-to-home. If you already have some experience, look for drones with agility and customization for tricks or racing. Professionals usually go for drones with long flight times, high-quality cameras, and advanced flight modes.
2. Purpose of Use
Determine why you need the drone. Is it for recreational flying, racing, capturing professional photography, or surveillance?
- Recreational flying: Go for affordable drones that are fun and easy to fly.
- Racing: Look for fast and agile drones designed for speed.
- Photography & Videography: Focus on camera quality, gimbals for stabilization, and smooth flight controls.
- Surveying/Inspection: Choose drones with GPS accuracy, longer range, and payload options.
- Education & Coding: Look for programmable drones such as the Ryze Tello, which are ideal for learning.
Each purpose demands different specifications in terms of speed, stability, camera quality, and durability.
3. Budget
Set a budget to find the perfect balance between the features you need and affordability. Remember, generally, pricier drones offer better performance and more features. Expensive doesn’t always mean better for beginners. Start small, upgrade later.
4. Flight Time and Range
Think about how far and how long you want to fly. Longer flights and ranges are great for exploring or pro photography, but cost more.
5. Camera Specifications
If you want stunning aerial photos or videos, pay attention to:
- Consider the camera’s resolution. 1080p is good for beginners; 4K is standard for high-quality footage.
- Its stability (important for smooth footage!), gimbals reduce shaky video.
- Special features like Zoom, HDR, and wide-angle lenses make footage more professional.
Let’s explore the top 5 RC drones for beginners.
Best 5 Remote Control Drones for Beginners
Choosing your first drone can feel overwhelming. To make it easier, here are five beginner-friendly drones that balance price, features, and ease of use.
1. DJI Mini 5 Pro
Credit: DJI
The DJI Mini 5 Pro is a great choice for beginner and hobbyist drone pilots looking for high-end features in a compact drone. It’s lightweight, easy to fly, and captures excellent photos and videos. Its foldable design and sub-250g weight let you easily pack it for travel and shoot aerial footage on the go.
The Mini 5 Pro combines advanced imaging capabilities with portability, making it perfect for capturing stunning aerial footage wherever you go.
Specifications:
- It weighs less than 249.9 g.
- Max flight time up to 36 minutes (with Intelligent Flight Battery Plus).
- Shoots 4K HDR video at up to 120 fps.
- 1-inch 50MP CMOS camera sensor
- Omnidirectional obstacle avoidance with LiDAR
- Supports 360° ActiveTrack and improved Return to Home
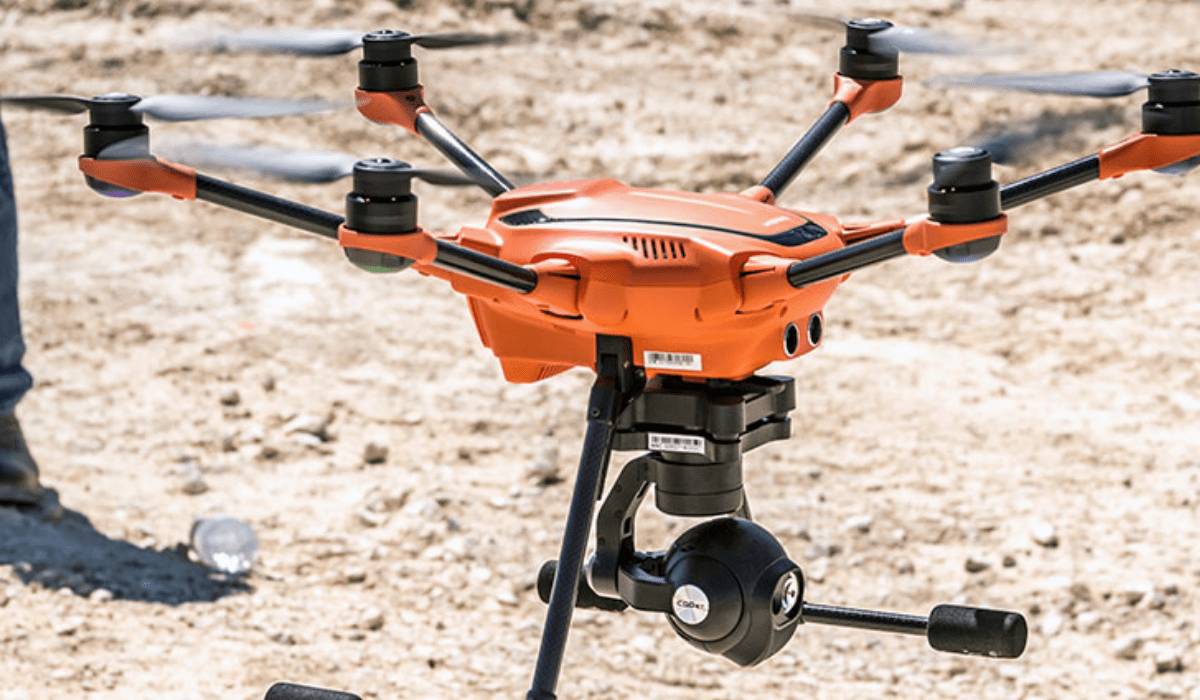
2. Yuneec Typhoon H Plus
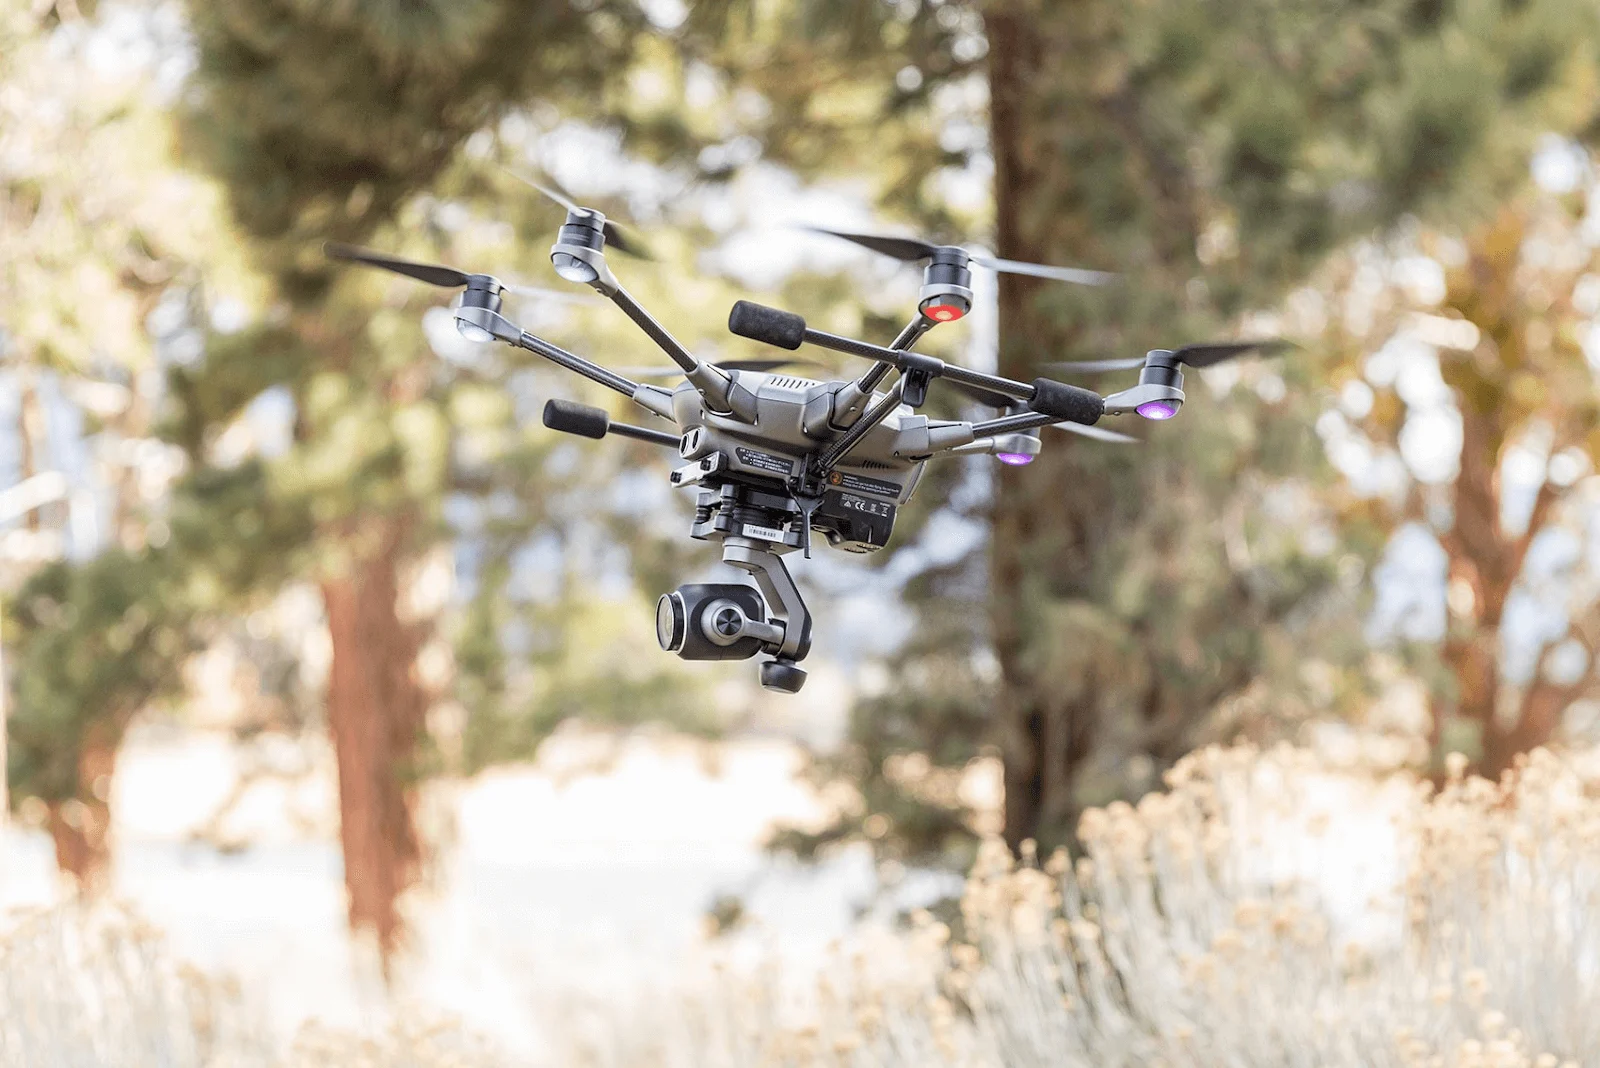 Credit: Yuneec
The Yuneec Typhoon H Plus is a versatile and reliable drone with a user-friendly ST16S controller. It comes with a 1-inch, 20MP camera mounted on a 3-axis gimbal. The gimbal allows full 360° rotation, making it easy to capture shots from any angle.
Typhoon H Plus stands out with its six-rotor design that ensures stability and safety. It also features obstacle detection, with the option to add Intel RealSense technology for advanced collision avoidance.
Specifications:
- It has 3 Gimbal Axes.
- It offers a maximum flying height of 1640 ft.
- Operating Temperature ranges from 0°C to 40°C.
- It has an effective pixel of 20MP.
- Max flight time of up to 28 min (with C23).
4. Holy Stone HS720E
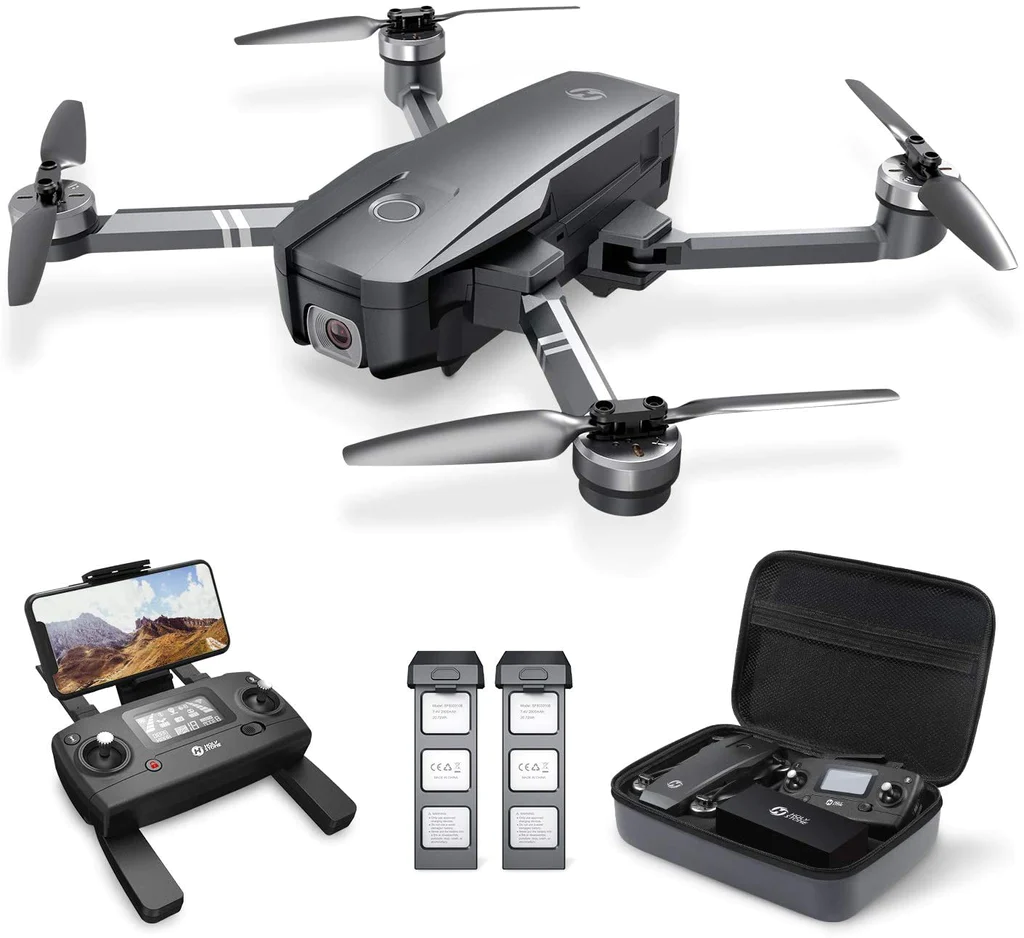 Credit: Holy Stone
The Holy Stone HS720E is an affordable option for beginners. It offers a stable flight experience and decent camera quality for the price. The controls are simple and beginner-friendly, making it easy to get started.
The HS720E provides a balance between affordability and functionality, making it a solid choice for newcomers to drone flying.
Specifications:
- It weighs 557 g.
- It offers a flying distance of 2624~3277 feet.
- Operating Temperature ranges from 32°F to +104°F.
- It has a live video feed at 60fps.
- The maximum flight time is up to 26 minutes.
5. Ryze Tello EDU
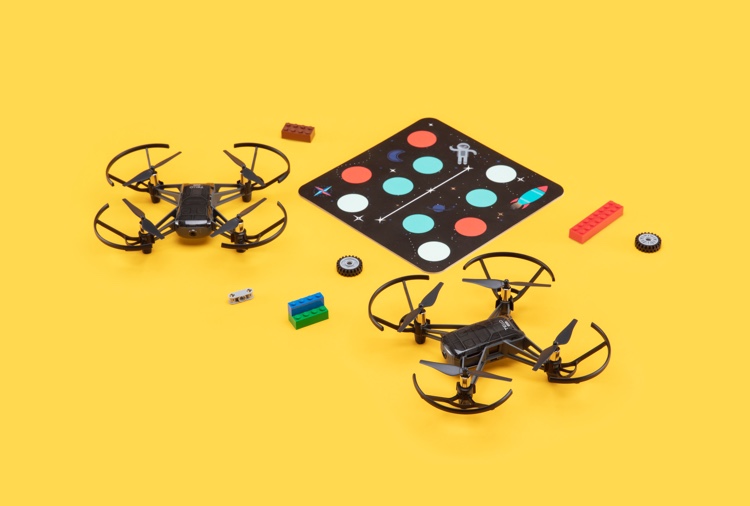
Credit: RyzeRobotics
The Ryze Tello EDU is a small, lightweight drone made for beginners and classrooms. You can program the drone with Scratch, Python, or Swift, starting with simple commands and building up to more advanced code. It offers a practical approach to learning both drone piloting and basic programming.
The Tello EDU also supports swarm flying, allowing you to control multiple drones simultaneously for coordinated routines. The mission pads let the drone detect its position and trigger actions automatically. Vision positioning and electronic image stabilization keep it steady, even when you fly indoors.
Specifications:
- It weighs 87 g (Propellers and battery included).
- It offers a 720p Live View at 30 fps.
- The Flight time is 13 minutes.
- It provides a range of 100m.
- It comes with a detachable battery: 1.1Ah/3.8V.
5. Potensic Atom 2

Credit: Potensic
The Potensic Atom 2 is a beginner-friendly drone that balances affordability with advanced features. It weighs under 249 g, making it easy to carry. It has an 8K camera with a 3-axis gimbal, delivering sharp and stable footage.
The drone supports AI tracking and vertical shooting, letting you capture dynamic shots with ease. Its 10 km video transmission range keeps you connected during long flights.
With intelligent flight modes and a compact design, the Atom 2 provides a smooth, beginner-friendly flying experience.
Specifications:
- It weighs about 249 g.
- It has a 48MP camera and shoots 4K HDR video at 30 fps.
- It features a 3-axis gimbal for stable footage.
- The max flight time is up to 32 minutes.
- It supports AI tracking, vertical shooting, and intelligent flight modes.
- It has a 10 km video transmission range.
Here’s a quick side-by-side look at the top 5 beginner drones, making it easy to compare price, flight time, and key features at a glance.
| Drone | Camera | Flight time | Standout Features | Best for | Price |
| DJI Mini 5 Pro | 50MP, 4K HDR @ 120fps | 36 minutes | 1-inch sensor, LiDAR, 225° gimbal, 360° ActiveTrack, 10-bit D-Log M | Travelers, videographers | $739 |
| Yuneec Typhoon H+ | 4K, 1-inch sensor | 28 minutes | 360° gimbal, Intel RealSense obstacle avoidance, foldable design | Prosumers, filmmakers | $1,899 |
| Holy stone HS720E | 4K, 130° FOV EIS | 46 minutes | GPS-assisted flight, Follow Me, Auto Return Home, budget-friendly | Budget hobbyists | $299.99 |
| Ryze Tello EDU | 5MP, 720p | 13 minutes | Programmable via Scratch, Python, Swift, swarm flying, educational tool | Students, Learners | Not Specified |
| Potensic Atom 2 | 48MP, 4K HDR @ 30fps | 32 minutes | 3-axis gimbal, AI tracking, vertical shooting, 10 km transmission, lightweight | Beginners, hobbyists | $359.99 |
Now that you know the best drones, let’s quickly see how RC drones work so you can fly with confidence.
How Does RC Drones Work?
The science and art behind remote control drones involve a fascinating blend of aerodynamics, electronics, and robotics. Here’s an overview of how these incredible flying machines work:
1. Aerodynamics
Drones rely on the principles of aerodynamics to achieve controlled flight. Their design incorporates fixed or rotary wings that generate lift when moving through the air. Fixed-wing drones operate similarly to airplanes, using wings and control surfaces for lift and maneuvering. Rotary-wing drones, like quadcopters and hexacopters, use propellers to generate lift and control their movement.
2. Propulsion and Power Systems
Drones are powered by electric motors that spin the propellers or provide thrust for fixed-wing models. These motors draw power from rechargeable batteries. Most drones use lithium-polymer (LiPo) batteries, which offer high energy density and fast discharge rates. The power system also includes electronic speed controllers (ESCs) that regulate the power delivered to each motor.
3. Flight Control Systems
At the heart of a drone’s operation is its flight control system, which consists of sensors and a flight controller. The sensors, such as accelerometers, gyroscopes, barometers, and GPS receivers, work together to collect data on the drone’s orientation, altitude, and position.
The flight controller, a small onboard computer, processes this information. It runs algorithms to stabilize the drone and respond to your commands from the remote control.
4. Remote Control and Communication
Drones are controlled remotely using a handheld transmitter. This transmitter communicates with the drone’s receiver via radio frequency (RF) signals. The transmitter usually has joysticks or other controls to command the drone’s movements. Many transmitters also feature a video display for viewing the live feed from the drone’s camera.
5. Cameras and Gimbals
Many drones today include cameras, perfect for capturing stunning aerial photography and videography. These cameras are often mounted on gimbals, which are motorized systems that keep the camera steady and compensate for the drone’s movements. This ensures your video is smooth and stable, even if the drone tilts or shakes.
6. The Pilot’s Role
Flying a drone is both a skill and an art. A good pilot learns how to coordinate the controls, understand basic aerodynamics, and predict how the drone will move. With practice, pilots can execute precise maneuvers, capture stunning aerial footage, and even perform acrobatic feats with their drones.
Drones bring together engineering and creativity. They combine smart design, advanced technology, and artistic freedom, allowing you to explore the skies in exciting new ways.
Now, let’s explore the many ways you can use remote control drones and get the most out of them.
Applications of Remote Control Drones
Let’s dive into the amazing applications of remote-control drones and understand how these flying machines are changing various industries.
1. Aerial Surveying and Mapping
Remote control drones make it easy to create detailed maps and surveys of vast areas. Equipped with high-resolution cameras and LiDAR sensors, they capture data with incredible accuracy and efficiency. These powerful tools are especially useful for surveying land. Thus, creating intricate maps for monitoring construction sites and inspecting mining operations.
2. Search and Rescue Operations
These aerial marvels have become essential tools for rescue teams around the world. You can access hard-to-reach locations and cover vast areas in a matter of minutes. That’s the power of drones in search and rescue operations.
You can deploy drones to locate missing persons in remote or hazardous areas. Hence, assess disaster zones from a safe distance and provide real-time aerial footage to aid rescue efforts.
3. Filmmaking and Cinematography
 Source: IE
Professional-grade drones with advanced cameras and gimbals have revolutionized the film industry, offering you creative freedom and cost-effective solutions for capturing cinematic shots.
With a drone at your fingertips, you can capture stunning aerial footage and unique perspectives that were once difficult or impossible to achieve.
These powerful tools allow you to get up close and personal with your subjects in ways that traditional cameras simply can’t match.
You can capture crisp, high-resolution images and videos from angles that were once impossible. This lets you push the boundaries of storytelling and keep your audience fully engaged.
4. Agricultural and Environmental Monitoring
Drones help you monitor crops and detect plant health issues, allowing you to optimize irrigation systems with ease.
These aerial workhorses, among the best drones for agriculture, can also track deforestation and provide accurate assessments of environmental impact.
This aerial perspective helps identify areas of concern quickly and efficiently, saving you time and resources.
With drones by your side, you can stay ahead of potential issues, optimizing yields while minimizing resource consumption and environmental impact.
When you invest a significant amount in drones, it is essential to keep them in good shape. After all, a well-maintained drone is a happy (and long-lasting) drone!
Maintenance and Care Tips for Your RC Drone
It is important to maintain and care for your drone to ensure its longevity and optimal performance. Proper maintenance not only extends the life of your drone but also enhances safety during flights. To keep your flying marvel in top condition, follow these maintenance tips:
1. Cleaning and Inspection Routine
Regularly clean and inspect your drone to catch early signs of damage or wear. This includes:
- Check the propellers for cracks or chips, or loose fittings. Replace them if damaged.
- Inspect motors to ensure they are functioning properly. Spin them by hand to make sure they move freely without strange noises.
- Examine the wiring and frame for frayed wires or loose screws.
- Wipe the drone down to remove dirt, dust, and debris, paying close attention to the sensors and camera.
This simple routine helps prevent small issues from turning into expensive repairs
2. Storage Tips
Proper storage is crucial to prevent damage and maintain your drone’s condition.
- Store your drone in a cool, dry place, away from direct sunlight or moisture.
- Use a protective case or bag to prevent dust accumulation and accidental damage during storage.
- Remove the battery if you won’t be using it for a while. Store batteries at around 50–60% charge to extend their life.
3. Troubleshooting Common Issues
Familiarize yourself with common issues and their solutions. This includes:
- Calibrating the compass to ensure accurate navigation
- Updating firmware to address bugs or add new features
- Replacing worn-out parts like propellers or motors.
Knowing how to troubleshoot saves you time and prevents your drone from being grounded unnecessarily.
4. Firmware Updates and Software Maintenance
Manufacturers release updates regularly for better flight stability and new features. Update your flight controller firmware through the official app or software. Also, keep your controller and mobile app updated for smooth communication.
5. Battery Care
Your drone battery is just as important as the drone itself.
- Avoid overcharging or fully draining the battery.
- Let the battery cool down before charging after a flight.
- Use only manufacturer-recommended chargers to avoid damaging the battery.
By following these maintenance tips, you can keep your drone reliable, safe, and ready for every flight. A little routine care goes a long way in avoiding crashes, costly repairs, and mid-air surprises.
Conclusion
The world of remote-control drones keeps growing, with new models and features coming out all the time. Whether you are a beginner or an experienced pilot, there’s always something new to learn. Try different flying techniques, experiment with your drone, and stay updated with the latest trends. Always follow local rules to fly safely and responsibly.
Even beginner-friendly drones today include advanced features such as autonomous flight, AI navigation, obstacle sensors, and longer battery life. These features make flying easier and safer. With these features, you can capture smooth aerial videos, create detailed maps, or even fly multiple drones at the same time.
Remember, drones aren’t just fun gadgets; they’re powerful tools for creativity, learning, and discovering new perspectives.
Stay curious, stay informed, and continue pushing the boundaries of what’s possible with remote-control drones.
Want to level up your skills and connect with other drone pilots?
Join Drone U today and boost your drone skills with expert flight training, real-world insights, and a drone pilot community.
Frequently Asked Questions
1. Do I need a license to fly an RC drone?
In many countries, you may need a license or certification to fly a drone for commercial purposes or if your drone weighs above a certain threshold. For recreational use with smaller drones, a license is usually not required. However, you may still need to register your drone and follow local flight rules.
2. Can I fly my drone in bad weather conditions?
It’s generally not recommended to fly your drone in adverse weather conditions, such as heavy rain, strong winds, or thunderstorms. These conditions can affect the drone’s stability, reduce visibility, and increase the risk of crashes or damage.
3. How do I maintain the battery life of my drone?
To maintain your drone’s battery life, follow the manufacturer’s guidelines for proper charging and storage. Avoid exposing the batteries to extreme heat or cold. Moreover, always use the recommended chargers and power sources.
4. What safety precautions should I take when flying my drone near wildlife?
When flying your drone near wildlife, it’s essential to maintain a safe distance and avoid disturbing or harassing animals. Additionally, be mindful of local regulations and guidelines regarding drone use in protected areas or wildlife habitats.
5. Can I use my drone to deliver packages?
The legality of using drones for package delivery varies by country and region. In many areas, commercial drone delivery operations are subject to strict regulations. Also, it may require specific licenses or certifications. Check local laws before attempting package delivery with a drone.
6. Can drones be used for indoor flying purposes?
Yes, there are specialized indoor drones designed for flying in confined spaces, such as houses, offices, or warehouses. These drones are typically smaller, more maneuverable, and equipped with features like obstacle avoidance and stabilization systems for safe indoor flight.
DJI Air 3S Review: The Mid-Range Drone That Nails It (Mostly)
If you’re shopping for a drone that offers serious camera power without the size or price of a flagship model, the DJI Air 3S might be exactly what you need. And in this DJI Air 3S review, I’ll explain why.
It’s been out for a while now.
After months of flying it in different conditions, I’ve gotten a good feel for what it can really do.
Specs aside, how does it feel to use it in the real world?
I’ll break down how the Air 3S handles in the air, the footage quality, and what features stand out after long-term use.
The Air 3S is clearly built for people who want pro-level results without the complexity. It’s easy to fly, fun to use, and packed with smart features that do the technical heavy lifting.
That said, it’s not perfect. A few things are missing that could matter depending on how you fly.
So, is the DJI Air 3S still worth buying in 2025?
Let’s take a closer look.
Where the Air 3S Fits in DJI’s Lineup
The DJI Air 3S doesn’t scream “flagship,” but after months of flying it, it sure performs like one.
It lives right between DJI’s two biggest sellers: the Mini 4 Pro and the Mavic 3 series.
That middle-ground label might sound unappealing, but in practice, it’s what makes the Air 3S so versatile.
Take the Mini 4 Pro, for example. It’s light and easy to fly anywhere with fewer FAA restrictions. However, its smaller sensor and limited low-light performance reveal their limitations once the sun sets.
While the Mavic 3 Pro is powerful, it features an adjustable aperture, a larger sensor, and 5.1K video capabilities. But it also costs more, weighs more, and often feels like too much drone for casual users or even solo creators.
The Air 3S hits that rare balance, featuring solid pro features without feeling bloated or intimidating.
It’s powerful enough for serious shooting (dual cameras, dynamic range, full manual control) but still small enough to fold up and carry in a backpack.
It holds up in the wind, handles dusk flights confidently, and shoots footage that doesn’t fall apart in post.
However, it’s not for everyone. If you want to avoid FAA rules completely, stick with the Mini.
If you’re a commercial filmmaker who needs full-frame sensors or an adjustable aperture, the Mavic 3 Pro will suit you better.
But for the people somewhere in between?
The Air 3S might be the most practical drone DJI makes currently.
DJI Air 3S vs. Mini 4 Pro vs. Mavic 3 Pro: Feature Comparison
| Feature | DJI Air 3S | DJI Mini 4 Pro | DJI Mavic 3 Pro |
| Camera System | Dual: 1″ CMOS (wide) + 1/1.3″ CMOS (telephoto) | 1/1.3″ CMOS (wide) + 1/1.3″ CMOS (telephoto) | Triple: 4/3″ CMOS (wide), 1/1.3″ CMOS (medium tele), 1/2″ CMOS (telephoto) |
| Max Video Resolution | 4K/120fps HDR, 14 stops dynamic range | 4K/60fps HDR, 12 stops dynamic range | 5.1K/50fps, 4K/120fps DCI, 12.8 stops dynamic range |
| Max Photo Resolution | 50 MP | 48 MP | 48 MP |
| ISO Range | 100–12,800 (wide), 100–6,400 (telephoto) | 100–12,800 | 100–6,400 |
| Transmission | O4 Transmission, 1080p @ 60fps, up to 20 km range | O4 Transmission, 1080p @ 60fps, up to 20 km range | O3+ Transmission, 1080p @ 60fps, up to 15 km range |
| Obstacle Avoidance | Omnidirectional with low-light sensors and LiDAR | Omnidirectional with low-light sensors | Omnidirectional with low-light sensors |
| Return to Home | Smart RTH with real-time mapping | Advanced RTH with APAS 4.0 | Advanced RTH with APAS 5.0 |
| Max Flight Time | 45 minutes | 45 minutes | 43 minutes |
| Weight | 724 g | <249 g | 958 g |
| Internal Storage | 42 GB | 2 GB | 8 GB (Cine version: 1 TB) |
| Price Range | $1,099 – $1,599 | $759 – $1,159 | $2,199 – $4,799 |
Let’s talk about the Air 3S features in detail.
1. Camera System
Air 3S delivers clean, crisp footage with solid dynamic range, even in tricky conditions like overcast skies, sunset lighting, or pre-dawn haze.
You don’t have to be a colorist to get usable, cinematic footage straight out of auto mode, but if you are into editing, the drone supports 10-bit D-Log M, HDR, and 4K at 60fps.
When I used it, there was no color grading, no color correction, and it still looked cinematic. That’s the 1-inch sensor doing its job.
With the 70mm equivalent field of view, you can punch its 3x telephoto lens in on distant subjects like wildlife, boats, hikers, or even architecture.
It also gives your footage a compressed, more professional look that the wide camera can’t always achieve.
That said, the camera system isn’t perfect.
Unlike the Mavic 3 series, the Air 3S doesn’t have a variable aperture. Both cameras are fixed at f/2.8.
So if you’re shooting in bright conditions, ND filters become mandatory. Not ideal when lighting changes mid-flight, forcing you to land just to swap glass.
Also, if you’re coming from a drone that shoots in 5.1K or 6K, the 4K cap here might feel limiting.
2. Flight Performance & Safety
Flying the Air 3S feels smooth and reliable. One standout feature is how well it handles wind.
In real-world tests, the drone easily manages gusts up to 12 meters per second. That means you don’t have to cancel your shoot just because it’s a bit breezy. It stays steady and keeps your shots clean.
Safety-wise, the Air 3S comes with omnidirectional obstacle avoidance. Plus, its low-light sensors are improved, so it can spot things even when the sun goes down.
One feature that impressed me is the Return to Home (RTH) function. This lets it take a smart, obstacle-free path home, even if GPS signals get weak or lost.
The Air 3S strikes a great balance between automation and manual control. You get enough help to stay safe, but you can still take full creative charge when you want.
If you’re worried about crashes or unexpected situations, this drone gives you peace of mind without sacrificing fun or creativity.
3. Battery Life
DJI advertises the Air 3S with a flight time of up to 45 minutes, which sounds amazing on paper.
But in real-world use, expect closer to 30 to 35 minutes per battery.
That’s still pretty good for a drone this size, but it’s something to keep in mind if you plan on long shoots or all-day flying.
It takes around 80 to 90 minutes to fully recharge a battery. So if you’re out in the field and juggling multiple batteries, this slow charging speed can be a bit of a headache.
Still, the Air 3S’s battery life is enough to cover most typical shoots, especially if you plan your flights in shorter bursts.
Having a couple of spare batteries on hand is definitely recommended if you want to keep the drone up in the air for longer.
In short, the battery life won’t blow you away, but it’s reliable and consistent enough to get the job done without constant interruptions.
4. Intelligent Flight Modes
The DJI Air 3S comes with the reliable ActiveTrack 360 mode. It lets the drone automatically follow and orbit you or your subject without you having to manually control it all the time.
The drone even makes decisions on the best angles and movement to keep your video looking cinematic.
Another favorite is Waypoints mode, which lets you program a specific flight path for the drone to follow.
This is super helpful if you want to repeat the same shot multiple times.
However, setting up waypoints can be a bit fiddly and time-consuming at first, but once you get the hang of it, it’s a powerful tool.
You also get other helpful modes like MasterShots, QuickShots, Spotlight, and Cruise Control, which let you create dynamic, professional-looking clips with minimal effort.
These modes take a lot of the guesswork out of flying and framing, making the Air 3S a solid choice with a friendly learning curve.
In short, the intelligent flight modes bring both creativity and ease, letting you focus more on your activity and less on piloting the drone.
5. Build Quality, Portability & Controller
The DJI Air 3S feels like a drone built to last.
It weighs in at 724 grams, so it’s not super light, but it’s still compact and easy to carry around.
Despite not being featherweight, it’s surprisingly portable.
It folds up nicely, slipping into a backpack or camera bag without taking up much space.
The construction is durable enough to handle regular use and the bumps of travel.
The controller is another strong point.
DJI includes the RC2 controller with a built-in 5.5-inch display that gets plenty bright (700 nits), so you can see your shots clearly even in sunlight.
After months of use, I found it comfortable and reliable, with no glitches or crashes to complain about.
Note: The gimbal guard is simple but essential. It protects the camera during transport and is easy to put on and take off, so don’t skip it.
Overall, the Air 3S strikes a nice balance for creators who want a travel-friendly drone without compromising quality.
6. Connectivity & Storage
Air 3s has an O4 transmission system that delivers a rock-solid live feed at 1080p and 60 frames per second. It offers a maximum range of up to 20 kilometers in ideal conditions.
In real-world tests, the signal stayed strong and clear, which means fewer frustrating dropouts or lag during flights.
With its Off-state Quick Transfer feature, you can offload videos and photos to your phone or tablet without even powering on the drone.
Internal storage has also seen a big upgrade compared to previous models.
The Air 3S offers a generous 42GB built-in storage with a microSD slot if you want to expand storage further.
Overall, the combination of strong signal transmission, smart file transfer, and ample internal storage is ideal.
The Air 3S takes the hassle out of flying. It lets creators spend more time capturing content and less time dealing with tech.
That said, let’s compare the pros and cons of the DJI Air 3S.
Pros & Cons of the DJI Air 3S Drone
Here’s a straightforward look at what really stands out and where it falls short.
Pros:
- Excellent low-light performance
- Dual-camera system with a 1-inch main sensor and 3x telephoto lens delivers sharp, vibrant footage in varied lighting.
- ActiveTrack 360 and enhanced Return to Home work reliably, making autonomous flying easier and safer.
- O4 transmission keeps your signal strong, with minimal dropouts, even in urban areas.
- Large 42GB internal storage means fewer worries about running out of space mid-shoot.
- Advanced obstacle avoidance with low-light sensors and LiDAR adds a safety layer, especially for less experienced pilots.
Cons:
- Fixed aperture means ND filters are essential for controlling exposure.
- Video maxes out at 4K, no 5.4K or 6K options like some competitors offer.
- No current goggle compatibility, which may disappoint FPV enthusiasts hoping for immersive flying.
- Battery charging is slower than that of some drones.
- It requires FAA registration and falls into a more restrictive category.
- Propellers tend to pick up nicks over time, so regular replacements are recommended for best performance.
Wrapping Up
After spending months with the DJI Air 3S, it’s clear this drone hits a sweet spot.
It combines many of DJI’s best features without the heavy price or size of their flagship models.
The dual-camera system delivers sharp, vibrant footage, even in low light. This makes it a solid choice for creators who want quality without breaking the bank.
Battery life is also decent, and the improved internal storage means fewer worries about running out of space on the go.
Of course, it’s not without its drawbacks. You’ll need ND filters to manage exposure. And if you’re chasing 5K+ video or immersive FPV-style flying, this drone may fall short.
If you want a mid-range drone that offers more than just good video quality, the Air 3S is a standout choice. It delivers an ideal mix of performance, portability, and price, making it one of the best options in its category.
If this drone has inspired you, why not take it to the next level?
Check out our hands-on drone courses and start flying with skill and confidence: Explore our drone courses here.
What LiDAR Systems Are NDAA Compliant?
Imagine this: you just spent $55,000 on a top-of-the-line LiDAR system. You’ve mounted, calibrated, and prepped your sensor for flight. Then the news hits, your sensor isn’t NDAA compliant.
Suddenly, you lose access to federal contracts. Even worse, state and local jobs tied to federal funding are off-limits, too.
That expensive gear? It may not qualify for half the work you’re planning to do.
This isn’t a hypothetical. By 2026, it could be a reality for a lot of drone pilots and LiDAR surveying teams.
The National Defense Authorization Act (NDAA) outlines what technology federal agencies can legally purchase or work with.
And with Section 164 of the 2024 NDAA, those rules just tightened, especially for LiDAR.
Systems built with components from certain foreign countries are now banned from Department of Defense (DoD) projects. But this change goes far beyond military contracts.
Many civilian infrastructure projects (bridges, roads, utilities) rely on DoD or other federal funding sources. If your sensor isn’t on the approved list, you’re out of the running.
That’s why NDAA compliance matters more than ever.
In this article, we’ll explain what NDAA compliance actually means. You’ll see why it affects more than just defense contractors.
We’ll also cover which LiDAR systems meet the current standards and which ones don’t.
Most importantly, you’ll learn how to protect your investment as the rules continue to evolve.
Before we dive into specific LiDAR systems, let’s understand what NDAA compliance actually means.
What Does NDAA Compliance Mean in LiDAR Systems?
NDAA stands for the National Defense Authorization Act. It’s a U.S. law that sets the budget and policies for the Department of Defense every year. However, it also includes rules governing the types of technology that federal agencies can purchase and utilize.
In recent years, the NDAA has placed strict restrictions on equipment that includes components from certain foreign countries, mainly China.
To be NDAA-compliant, a LiDAR system must not contain any banned parts or subcomponents from those restricted countries. That applies to everything: the sensor, the camera, the GPS module, and even the internal chips.
The focus isn’t just on where the system is assembled. It’s on where each component is manufactured. Even if your LiDAR unit is built in the U.S. or Europe, using parts from restricted suppliers can make it non-compliant.
The goal of the NDAA is to eliminate cybersecurity risks tied to foreign-made tech. So compliance is mostly about supply chain transparency and national security.
Federal procurement agencies strictly enforce these compliance rules. Manufacturers must provide documentation showing that their systems are fully NDAA-compliant.
Without this certification, federal agencies won’t approve the product for use on funded projects.
So when someone says a LiDAR system is “NDAA compliant,” they mean it’s been verified to meet these sourcing and security requirements.
Now, let’s understand what actually changed.
NDAA 2024 & Section 164: What Changed for LiDAR
Until recently, the NDAA mostly focused on broad categories of banned tech—things like Chinese-made drones, telecom equipment, and surveillance hardware. But in 2024, Congress passed Section 164 as part of the updated NDAA. And this time, regulators targeted LiDAR systems directly.
This is a big shift.
LiDAR is now seen as a potential security threat. It’s grouped with other sensitive tech that could be used for surveillance or data collection. That puts it under much tighter restrictions.
Starting June 30, 2026, the Department of Defense and other federal agencies cannot use any LiDAR system that:
- Is built or developed in China, Russia, Iran, or North Korea
- Uses software, data storage, or cloud services connected to those countries
And it’s not just about the complete system. Even individual parts matter. If your LiDAR uses a GPS board, chip, or firmware from a restricted country, it won’t be compliant.
To make things crystal clear, Congress didn’t leave it vague. They named companies directly. At the top of that list is Hesai Technology.
Section 164 expressly prohibits LiDAR developed by Hesai Technology, headquartered in Shanghai, China, a leading manufacturer of LiDAR sensors that are used in both commercial self-driving cars and Chinese autonomous warfare systems.
Hesai is one of the most popular LiDAR manufacturers worldwide. Many drone service providers use sensors like the XT32 because they’re affordable and reliable. But starting in 2026, any LiDAR using Hesai hardware will be banned from DoD-related projects.
Is there a way around it? Technically, yes.
There is a waiver process for special situations. The Secretary of Defense can grant a waiver to certain institutions. But to do that, they must certify to Congress that the waiver is in the national interest of the United States.
In reality, the process is slow and uncertain.
Watch this video to learn more about NDAA-compliant LiDAR systems:
What LiDAR systems are NDAA-compliant?
With this, let’s explore the available LiDAR options.
NDAA-Compliant LiDAR Options for Drone Pilots
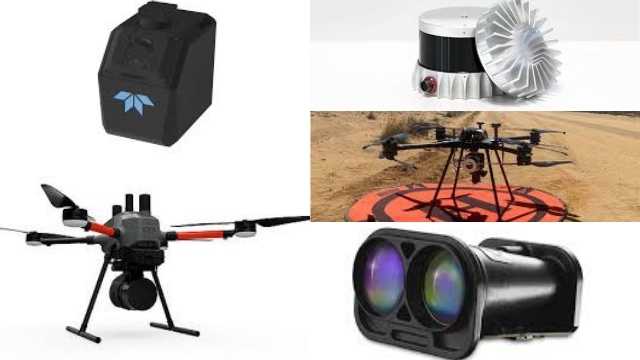
Top NDAA-Compliant LiDAR Systems
Choosing a LiDAR system isn’t just about range, resolution, or price anymore. It’s about compliance.
Here are some top NDAA-compliant LiDAR options, and why they cut:
1. Ouster OS Series (OS1 / OS2)
Ouster’s OS series is a popular digital LiDAR solution for mapping and infrastructure inspection. These sensors are listed on the Blue UAS Framework, making them pre-approved for DoD and government-related contracts.
These sensors offer sharp, high-resolution point clouds and perform well in harsh environments.
A good all-around choice for mapping and inspection flights.
2. LightWare LW20/C & SF20/C
LightWare provides lightweight LiDAR sensors that integrate easily with small UAVs. Their LW20/C and SF20/C models are NDAA-compliant and ideal for obstacle avoidance, compact mapping missions, or smaller drone platforms.
These sensors are particularly attractive to pilots who want an affordable, low-weight LiDAR solution without compromising on security requirements.
3. LIBERTY 64 LiDAR System
The LIBERTY 64 is a full LiDAR scanning system. It’s NDAA-compliant when paired with a U.S.-made drone. It is well-suited for survey-grade missions where accuracy and end-to-end compliance matter.
4. Teledyne Geospatial EchoONE
The EchoONE is a lightweight UAV LiDAR system built with security in mind. Its combination of precision, compact size, and secure supply chain makes it a popular option for mapping operations.
5. Microdrones EasyOneLiDAR NDAA Packages
Microdrones NEW EasyOneLiDAR NDAA offers complete, ready-to-fly NDAA-compliant packages, including drone, LiDAR sensor, GNSS/IMU, and datalink. These turnkey solutions are perfect for teams that want to avoid the hassle of sourcing and integrating separate components.
Perfect if you want to skip the hassle of integrating different parts.
How to Verify NDAA Compliance for LiDAR Systems
Here’s how to properly verify that your LiDAR system meets NDAA standards before it costs you a project.
1. Check the Blue UAS Framework
Start by checking if your LiDAR system is listed under the Blue UAS Framework or included in the DIU (Defense Innovation Unit) cleared components. These lists are curated by the U.S. Department of Defense and represent the most reliable source of NDAA-vetted hardware.
- Look for your exact LiDAR model (not just the brand) on the list.
- Only models listed here are officially recognized for DoD and federal contracts.
2. Ask for Written Vendor Attestation
Reputable vendors provide a formal statement confirming NDAA compliance. This should include:
- Reference to Section 164, NDAA 2024.
- Confirmation that no components come from banned countries (China, Russia, Iran, or North Korea).
- A signature from a company officer or compliance lead.
3. Review the Supply Chain Details
NDAA compliance isn’t just about the final sensor. It also covers where the components come from.
- Ask the vendor for a Bill of Materials (BOM) or a redacted supplier list.
- Confirm that critical components (IMUs, GNSS, LiDAR chips) don’t originate from restricted countries.
Some compliant manufacturers are already providing this by default.
4. Verify the System’s Cybersecurity
Compliance also includes data protection and system integrity. Verify that your LiDAR system supports:
- Encrypted data transmission (AES-256 or higher).
- Signed firmware updates to prevent tampering.
- Secure boot processes where applicable.
If the system lacks these features, it may pass today but fail a future audit.
5. Understand the Update & Support Policy
Even a compliant system can become non-compliant if you update it using untrusted networks. Ask:
- Does the vendor provide secure firmware updates?
- Are system updates documented to ensure NDAA compliance?
- Can you get support or spares from the U.S. or trusted partners?
This protects you against future disqualification due to hidden changes.
6. Keep a Compliance File for Bids and Audits
When bidding for federal contracts, you’ll need to provide proof of compliance. Set up a dedicated folder and save:
- Blue UAS Framework screenshots or URLs (if listed)
- Vendor NDAA attestation letters
- BOM or supply chain confirmation documents
- Firmware version records and changelogs
You may need this documentation when bidding on DoD or federally funded projects.
This file could make or break your eligibility in a competitive bid.
NDAA compliance is your responsibility, not the vendor’s. So, do the work now, document everything, and you’ll avoid expensive problems down the line.
Made it this far?
Understanding NDAA compliance is just the beginning.
Take your drone skills to the next level with our specialized drone training. Explore our drone courses here.
If you’re now searching for the best LiDAR drones, be sure to check out this article: Best LiDAR Drones for Surveying & Mapping.

Best FPV Drones For Beginners [2025]
Imagine feeling the wind in your hair as you zip through the air. With FPV drones or First Person View drones, this becomes a reality. These drones offer an immersive flying experience, letting you see the world exactly as the drone sees it.
Picture yourself wearing FPV goggles as you easily control the drone, feeling like you’re truly in flight. Instead of grainy camera views, today’s best FPV drones let you dive through trees, soar over landscapes, and capture smooth aerial footage in real time. Whether you’re interested in freestyle flying, cinematic shots, or just want a fun beginner-friendly drone to practice with, FPV technology is now more accessible than ever.
In this beginner’s guide, you’ll learn what FPV drones are and how they differ from traditional camera drones. We’ll also explore the best FPV drones for 2025 and the key tips you need before your first flight.
Before choosing your first drone, let’s first understand what exactly FPV drones are and how they differ from traditional camera drones.
What are FPV Drones?
An FPV drone, or First Person View drone, is an unmanned aerial vehicle with a built-in camera. The camera transmits live video directly to the pilot through a headset, FPV goggles, or a screen. Instead of watching from the ground, you see the flight path in real time. It’s almost like sitting inside the drone’s cockpit and exploring the world as the drone sees it.
FPV technology has revolutionized the world of drones.
Earlier, pilots relied only on direct visual observation, which limited their range and made obstacle avoidance harder. With FPV, pilots can explore greater distances and navigate through narrow spaces. The live video feed streams straight to their goggles, letting them capture breathtaking aerial footage from unique angles.
This immersive experience attracts both hobbyists and professionals. Filmmakers use it for dynamic shots. Rescue teams rely on it to locate people. Farmers apply it to monitor crops. The real-time view gives every pilot an advantage. For beginners, FPV drones create an immersive way to fly and a hands-on path to building skills.
Let’s take a closer look at what FPV drones can offer.
FPV Drones vs. Traditional Drones: Detailed Comparison
| Feature | Traditional Drones | FPV Drones | What It Means for You |
| Flight Experience | Standard camera view from a distance, similar to surveillance. | Immersive, in-the-pilot-seat experience through FPV goggles or live screen feed. | Engagement: Feel like you’re truly flying, not just piloting. Great for hobbyists who want more excitement. |
| Control & Maneuverability | Basic controls with limited precision. Ideal for wide, open areas. | Advanced maneuverability with precise controls for racing, stunts, or tight spaces. | Performance: Perfect for aerial videographers, racers, and those who need agility in complex environments. |
| Real-Time Monitoring | Delay in feedback—making it harder to react in time. | Instant, real-time video feed, allowing quick decisions mid-flight. | Reaction Time: Critical for capturing perfect shots, avoiding obstacles, and professional-grade flying. |
| Applications | Primarily for photography and simple aerial footage. | Versatile: Ideal for racing, filmmaking, inspections, and rescue missions. | Flexibility: Great for both recreational fun and high-stakes professional tasks like search-and-rescue. |
| Ease of Use | Beginner-friendly, with easy-to-use controls and stability. | Steeper learning curve, but with more rewarding outcomes for mastery. | Skill Growth: Start with traditional drones and transition to FPV for advanced skills. |
| Price Range | Affordable options available for entry-level users. | Generally higher cost, especially for racing or professional-grade models. | Investment: FPV drones are worth the investment if you’re looking for long-term versatility and performance. |
Having mastered the basics, let’s look at the 5 best FPV drones for beginners.
Best FPV Drones For Beginners
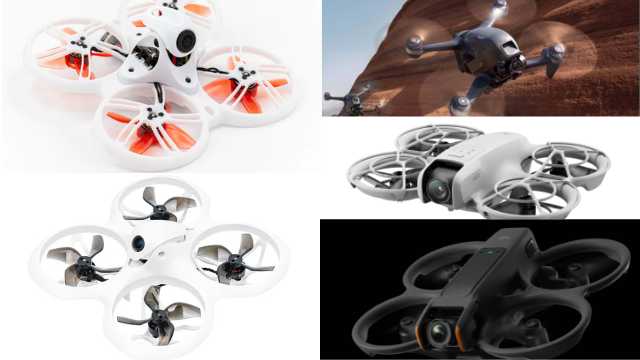
Here are some of the best FPV drones for beginners:
1. DJI FPV Combo
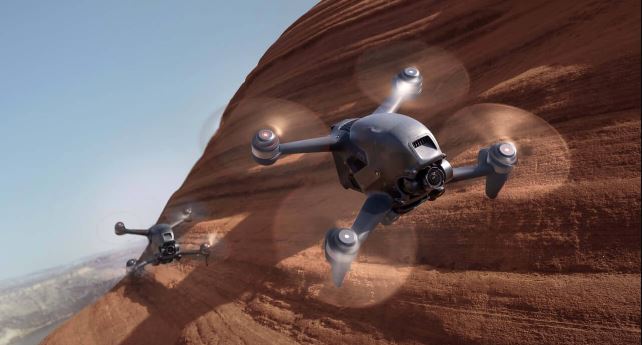 Source: DJI
The DJI FPV Combo is a top-of-the-line FPV drone that offers an immersive first-person flying experience. Its 4K/60fps camera and RockSteady stabilization let you capture smooth, cinematic footage with ease.
The kit includes the DJI FPV Remote Controller 2 and a pair of FPV goggles, allowing you to fly without any additional gear. With GPS positioning, obstacle sensors, and multiple flight modes, it helps beginners build confidence while keeping flights safe.
This drone is a good option for beginners who want a ready-to-fly FPV setup with strong safety features and high-quality video.
Features and Specifications
- 4K/60fps super-wide-angle camera
- Three flight modes: Normal, Manual, and Sport
- Maximum transmission range of 10 km
- 20-minute flight time
- GPS and obstacle-sensing
- Intelligent flight modes, including ActiveTrack and QuickShots
Pros and Cons
|
Pros |
Cons |
|
|
2. EMAX Tinyhawk III FPV Racing Drone
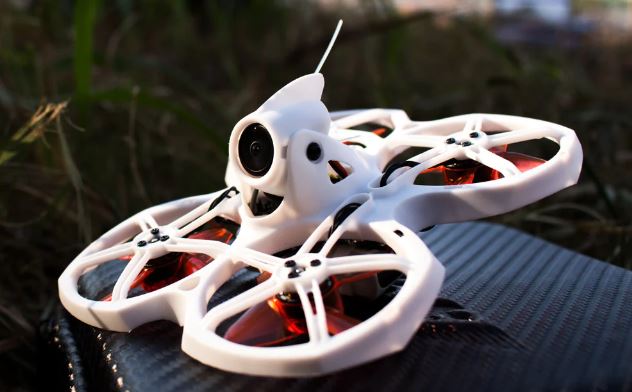 Source: Emax
EMAX now offers Tinyhawk III, a direct upgrade of the TinyHawk II. The new version improves on durability, camera quality, and delivers smoother flight performance. It gives beginners a better flying experience while keeping the same small, portable size.
If you own the Tinyhawk II, you can still use it as a capable trainer. But if you plan to buy new, the Tinyhawk III is the better upgrade.
Features and Specifications
Sharper FPV camera with better low-light performance
- Stronger frame for better crash resistance
- Efficient motors for smoother, stable flight
- Beginner and advanced flight modes
- Compact, lightweight design for indoor and outdoor use
- Easy access to spare parts and accessories
Pros and Cons
|
Pros |
Cons |
|
|
3. DJI Avata 2
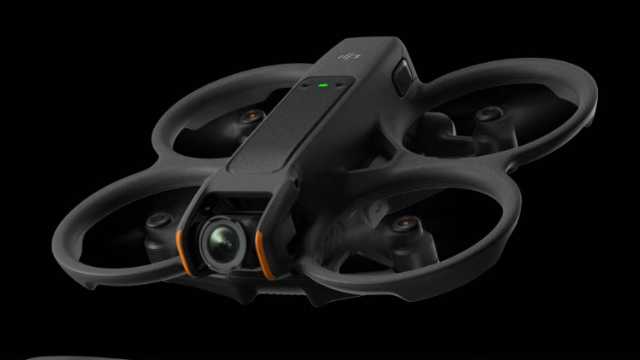 Source: DJI
The DJI Avata 2 is a beginner-friendly FPV drone that combines safety with cinematic performance. Its 1/1.3-inch sensor records crisp 4K/60fps video, while RockSteady and HorizonSteady stabilization keep footage smooth and steady.
The kit includes DJI Goggles 3 and the Motion Controller 3, offering an immersive flight experience right out of the box. With its ducted propeller design, the Avata 2 handles bumps and crashes better than most FPV drones, making it ideal for new pilots.
This drone is the best option for beginners looking for a ready-to-fly FPV experience, offering strong safety features, intuitive controls, and professional-quality video.
Features and Specifications
- 1/1.3-inch sensor with 4K/60fps video
- RockSteady and HorizonSteady stabilization
- Up to 23 minutes of flight time
- Ducted propeller guards for safety
- DJI O4 video transmission up to 13 km
- Works with DJI Goggles 3 and Motion Controller 3
Pros and Cons
|
Pros |
Cons |
|
|
4. DJI Neo

Source: DJI
This beginner-friendly drone is an excellent choice for anyone looking to dive into FPV flying. The DJI Neo comes with a ready-to-fly setup, including intuitive controls and a set of FPV goggles.
It features a high-quality 4K camera for stunning video and sharp photos. The drone offers smooth, responsive flight performance. Its durable build makes it ideal for both beginners and experienced pilots.
Features and Specifications
- 1080p HD camera for high-quality video and photo capture
- Altitude hold function for stable flight
- Headless mode for easy orientation
- One-key takeoff and landing
- 10-minute flight time
Pros and Cons
|
Pros |
Cons |
|
|
5. BetaFPV Cetus X Kit
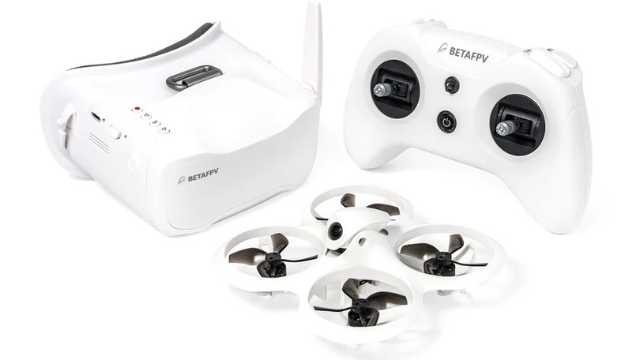
Source: BetaFPV
This mini drone is a great option for beginners who want a fun, portable, and affordable FPV setup.
The BetaFPV Cetus X Kit includes a compact controller, FPV goggles, and everything you need for immediate takeoff. It features a 720p HD camera and a gyroscope for stable, smooth flight. It also has responsive controls and a lightweight, durable frame. These features make it ideal for practicing basic maneuvers and learning FPV flying.
Its intelligent flight modes make it easy for beginners to capture professional-looking aerial footage, while the compact design allows for both indoor and outdoor fun. In short, the Cetus X Kit offers a reliable, engaging FPV experience without overwhelming new pilots.
Features and Specifications
- 720p HD camera for clear FPV video
- Gyroscope for stable flight
- Altitude hold for steady hovering
- Headless mode for easy orientation
- One-key takeoff and landing
- Lightweight, durable frame with 360° protection
- Compact controller and FPV goggles included
- 5-minute flight time per included 450 mAh battery
Pros and Cons
|
Pros |
Cons |
|
Ready-to-fly kit Lightweight and crash-resistant Easy controls with headless mode Ideal for beginners and learners Compact size for indoor and outdoor flights |
|
Top 5 FPV Drones for Beginners: Quick Comparison
| Drone Model | Best For | Camera | Flight Time | Key Features | Price Range |
| DJI FPV Combo | High-quality aerial footage | 4K/60fps | 20 min | GPS, obstacle sensing, long range (10 km) | $778.59 |
| EMAX Tinyhawk III | Indoor and outdoor practice | Digital FPV camera | 3-4 min | Compact, durable, beginner flight modes | $269.09 |
| DJI Avata 2 | Professional-grade filming | 4K | 23 min | Obstacle sensing, intelligent flight modes | $769 |
| DJI Neo | Beginner-friendly FPV flying | 4K Ultra HD | 18 min | GPS, obstacle detection, immersive FPV goggles | $199 |
| BetaFPV Cetus X Kit | Affordable training and practice | C04 FPV Camera (Caddx Nano Ant Camera/Runcam Nano 4) | 5 min | Altitude hold, headless mode, VR03 FPV goggles | $309.99 |
Note: Prices and specifications are based on the latest available data as of 2025. Actual costs may vary by retailer and region.
FPV Drones Flying: Important Definitions and Concepts
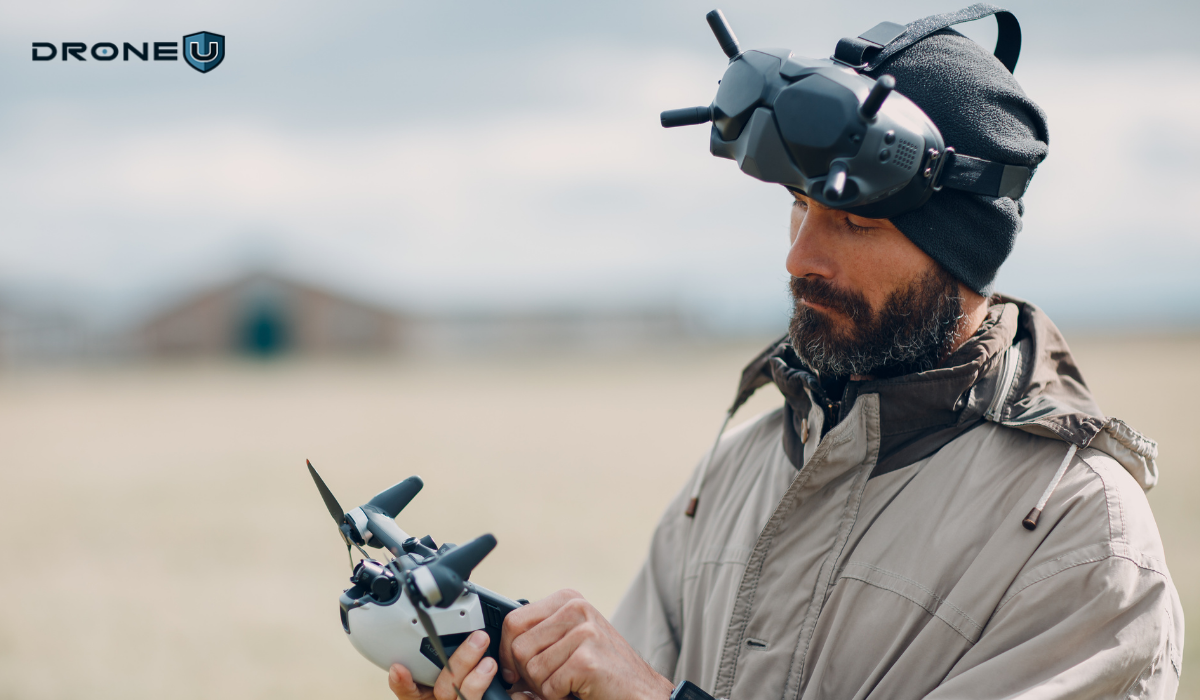
To fully understand FPV drones, it’s important to familiarize yourself with these key terms:
First-Person View (FPV)
FPV refers to the experience of seeing the world from a drone’s perspective in real time. This is achieved using FPV goggles or a screen, which receives the live video feed from the drone’s camera.
Brushless Motors vs. Brushed Motors
Brushless motors are more efficient, powerful, and durable compared to brushed motors. They provide smoother control and increased power, making them ideal for FPV drones.
Flight Controllers and Their Functions
The flight controller is the brain of the drone. It manages stability, navigation, and flight modes, ensuring smooth handling and safety during flight. Advanced controllers can also support features like GPS, return-to-home, and custom flight programming.
FPV Goggles and Screens
FPV goggles provide an immersive flying experience, placing you virtually in the drone’s cockpit. Screens, on the other hand, offer a larger, shared view, which is useful for beginners or group flights. Some modern goggles even integrate augmented overlays like speed, battery life, and telemetry data.
Radio Transmitters and Receivers
Radio transmitters and receivers are used to control the drone’s flight. Transmitters send commands to the receiver, which then instructs the drone on how to maneuver. On the other hand, receivers onboard interpret these signals and control the motors and flight surfaces. Modern systems often include features like multiple channels, customizable controls, and long-range connectivity.
LiPo Batteries and Safety Precautions
LiPo (Lithium Polymer) batteries are commonly used in FPV drones for their high energy density. Safety precautions such as proper charging, storage, and handling are important to prevent overheating, swelling, or fires. Many pilots also use fireproof charging bags and balance chargers to ensure battery longevity.
Having explained the benefits and key terms, it is time to understand their limitations.
Limitations of FPV Drones
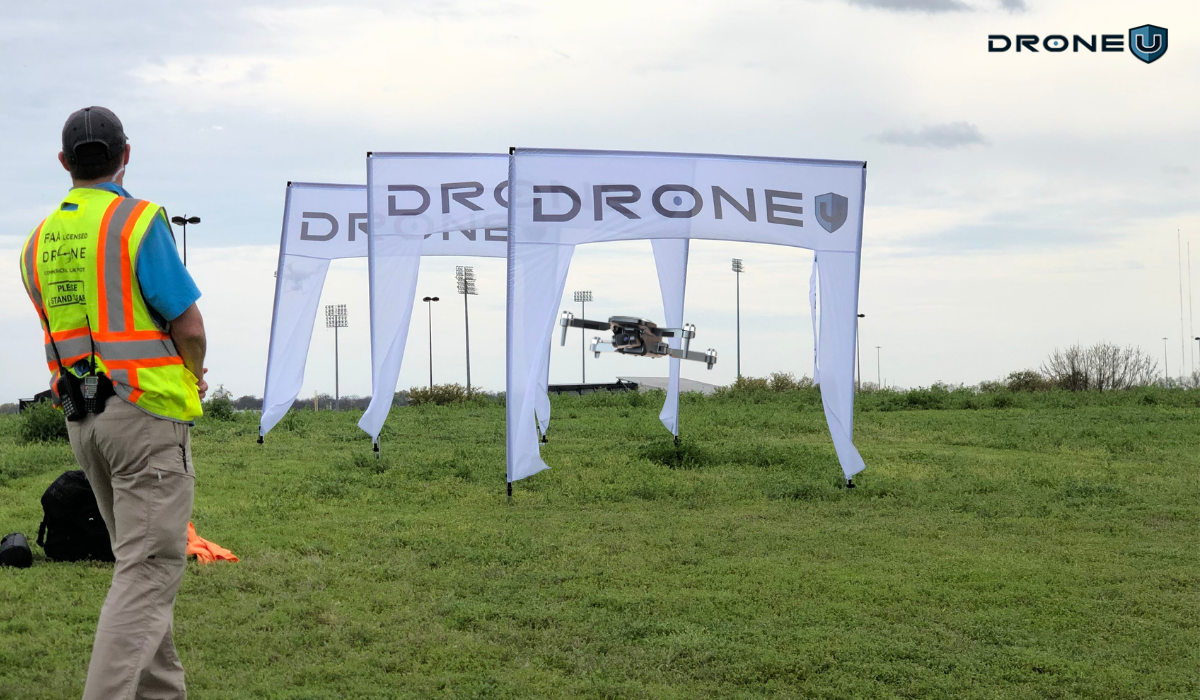
While FPV drones offer incredible benefits, they do have some limitations:
1. Short Flight Time and Battery Life
Most FPV drones have a relatively short flight time due to their compact size and high power consumption. This can limit the amount of time you have in the air before needing to recharge or swap out batteries.
2. Limited Range and Signal Interference
FPV drones typically have a limited range compared to traditional camera drones. Signal interference can also affect the video transmission, leading to static or loss of connection. This can restrict the distance you can fly and the quality of the video feed.
3. Learning Curve for Beginners
FPV drones require some learning and practice to master. The first-person view can be disorienting for beginners, and the controls may take some time to get used to. However, with dedication and practice, beginners can quickly become proficient in flying FPV drones.
4. Cost Considerations and Maintenance
FPV drones can be more expensive compared to traditional camera drones due to their advanced features and specialized equipment. Additionally, they require regular maintenance and the occasional replacement of parts, which adds to long-term costs.
Choosing the Right FPV Drone for You
When selecting your first (or next) FPV drone, keep these factors in mind:
1. Assess Your Skill Level and Goals
Evaluate your flying experience and identify your goals. Are you a complete beginner looking for a training drone? Or do you have some flying experience and want to take your skills to the next level?
Beginners can start with entry-level kits designed for learning. Experienced pilots may prefer drones with advanced flight modes or customizable features for racing and freestyle flying. Understanding your skill level will help you choose a drone that matches your needs.
2. Consider the Budget and Cost of Accessories
Set a realistic budget for your drone. Don’t forget to include the additional costs of accessories such as spare batteries, FPV goggles, chargers, and replacement parts. It’s important to factor in these costs to ensure you have a complete and functional setup.
3. Check Brand and Customer Support
Choose drones from reliable manufacturers with good customer reviews. Check the availability of accessories and customer support to ensure you have a reliable and trusted brand.
Conclusion
With so many great options on this list, there’s a model suited for every skill level and budget. Whether you’re just starting with a beginner-friendly kit or exploring advanced options, FPV drones make flying exciting and accessible. The right drone can open up a whole new perspective on the skies.
As you begin your FPV journey, make safety and drone regulations a priority. Carry extra batteries, practice in open areas, and embrace the learning process. With patience and practice, you’ll soon be capturing smooth, immersive footage and enjoying the true thrill of FPV flying.
Ready to level up your flying?
Join Drone U for expert training, proven strategies, and a supportive pilot community.
Frequently Asked Questions
1. What does FPV mean for a drone?
FPV stands for First Person View. It refers to a technology that allows you to view the drone’s flight from a first-person perspective using a video feed transmitted from a camera on board the drone. This video feed is viewed through a headset or goggles, making you feel as if you are piloting the drone yourself. FPV drones offer an exhilarating experience, giving you a real sense of flight and control.
2. Are FPV drones legal in the US?
Yes, FPV drones are legal in the United States. However, certain rules and regulations must be followed to ensure safe and responsible use. The Federal Aviation Administration (FAA) has specific guidelines that govern the operation of drones, including FPV drones.
Some of the regulations for flying FPV drones in the US include:
Registering your drone with the FAA if it weighs over 0.55 pounds (250 grams).
Flying your drone only within the visual line of sight.
Avoid flying near airports and restricted airspace.
Following community-based safety guidelines and local laws.
By adhering to these regulations, you can enjoy flying your FPV drone without any legal issues.
3. How much does an FPV drone cost?
The cost of an FPV drone can vary greatly depending on the features and specifications you are looking for. As a beginner, it is recommended to start with a more affordable option before investing in more advanced models.
Entry-level FPV drones designed for beginners typically range from $100 to $300. These drones usually come with a compact and durable design, basic flight features, and a lower-quality camera. While they may not offer the same level of performance as higher-end models, they are perfect for learning the basics of FPV flying.
On the other hand, if you’re looking for more advanced features and better video quality, the price can go up to $1000 or more. These drones often come equipped with obstacle avoidance systems, advanced flight modes, and high-resolution cameras for capturing stunning aerial footage.
Ultimately, the cost of an FPV drone will depend on your budget and requirements. It’s important to do thorough research and read reviews to find the best option that suits your needs.
4. Are FPV drones good for beginners?
FPV drones can be a great option for beginners who are eager to try their hand at drone flying. While they may have a steeper learning curve compared to traditional drones, the immersive experience they offer is highly rewarding.
Here are a few reasons why FPV drones are good for beginners:
Improved control: FPV drones allow you to see the drone’s flight path in real time, giving you a better sense of control. This can help beginners to practice and master their piloting skills more effectively.
Engaging experience: Flying an FPV drone is like being in the pilot’s seat, experiencing the thrill of flying firsthand. This immersive experience can make learning to fly a drone more exciting and enjoyable.
Skill development: FPV flying requires a higher level of skill compared to traditional line-of-sight flying. By starting with an FPV drone, beginners can develop their situational awareness, hand-eye coordination, and decision-making abilities, which are valuable skills for any drone pilot.
Beginners need to start with a beginner-friendly FPV drone and take the time to practice flying in open and safe areas. As their skills improve, they can gradually upgrade to more advanced models and explore the full potential of FPV flying.

How to Choose the Right Drone for Your Enterprise Program in 2025
Ever feel overwhelmed when choosing a drone for your enterprise program? If you’re building or scaling your team, you’re probably wondering which platform will really deliver what you need.
That’s the problem many enterprise leaders in utilities, construction, and public safety are facing today. The drone market is crowded, regulations are changing, and every wrong turn can cost time and money.
Choose the right drone and you’ll get accurate data, stay compliant, and prove ROI to stakeholders. Choose the wrong one and you’ll get grounded flights, unusable data, or even be disqualified from federal projects under NDAA restrictions.
This guide will help you avoid that. We’ll break down the main categories of enterprise drones, explain the use cases, and what matters most in 2025 to make an informed decision.
Let’s start by understanding why it matters.
Why Enterprise Drone Selection Matters
Enterprise drone programs differ from recreational flying or small commercial operations. Here’s why selecting the right one matters.
More Than Just Flying Cameras
Enterprise drone programs are different from recreational flying or small commercial operations. In this case, drones are business-critical.
They capture accurate data, streamline workflows, and help organizations comply with strict regulations. Choosing the wrong platform will stall adoption, drain budgets, or even disqualify you from government contracts.
Regulatory Changes in 2025
The FAA’s Remote ID rule has changed how drones must be identified in flight, while NDAA restrictions continue to limit the use of Chinese-manufactured drones like DJI in sensitive programs. Meanwhile, UTM integration and BVLOS waivers are redefining what a future-ready enterprise program looks like.
Performance, ROI, and Compliance
Choosing the right drone isn’t just about specs or camera quality. It’s about having a reliable, scalable, and compliant system.
A well-chosen platform reduces risk while improving efficiency, often offsetting higher upfront costs with long-term savings on operations, labor, and compliance.
Modular payloads and upgrade paths also future-proof your investment, extending the value of each aircraft as missions evolve.
Mission Defines the Drone
The best place to start with drone selection is the mission itself. Every enterprise drone falls into a specific category based on the type of data it captures – whether that’s high-res mapping for construction, thermal inspection for utilities, LiDAR for forestry, cargo delivery for logistics, or surveillance for security teams. Matching the mission to the right platform is the foundation of choosing a drone for your enterprise program. It’s how you maximize ROI and avoid costly mismatches.
A) Mapping & Surveying Drones: Looking Down
Need to create accurate maps, 3D models, or surveys of large areas? That’s where mapping drones come in. They capture the world from above, delivering orthomosaics, 3D models, and terrain data.
These drones are widely used in construction, road projects, accident reconstruction, and land surveying.
Mapping drones rely on RTK or PPK workflows to achieve survey-grade accuracy, making them essential for geospatial professionals.
1. FreeFly Astro Prime / Max
The FreeFly Astro series is a US-made NDAA-compliant platform for high-accuracy mapping and surveying. Both models have RTK positioning, hot swappable batteries, and modular payload support. These features make the FreeFly Astro Prime / Max a professional photogrammetry tool.
For standard mapping workflows, the Astro Prime delivers precise results for construction, land survey, and utility inspections. The Astro Max is an upgraded version with more payload capacity and longer flight time, so it’s better suited for large-scale or heavy lift survey missions.
In addition to mapping, the Astro also supports high-end cinematography. It captures cinema-grade video and delivers survey-grade data so you can manage creative and technical deliverables with one drone instead of two. That’s why Astro is a practical choice for enterprise programs.
Specifications:
| Feature | Astro Prime | Astro Max |
| Compliance | NDAA-compliant, U.S.-made | NDAA-compliant, U.S.-made |
| Payload capacity | Up to 1.5 kg (3.3 lbs) | Up to 3 kg (6.6 lbs) |
| Mapping Accuracy | Sub-centimeter with RTK | Sub-centimeter with RTK |
| Flight Time | Up to 37 minutes without payload; 28–34 minutes with LR1 payload | Up to 39 minutes without payload; ~28 minutes with LR1 payload |
| Transmission Range | Up to 10 km | Up to 10 km |
| Obstacle Avoidance | Integrated | Integrated |
| Weight | ~3.5 kg | ~4.5 kg |
| Folded Dimensions | 16″ x 16″ x 6″ | Not Specified |
| Payload Options | Sony ILX-LR1 (61 MP) | Sony ILX-LR1 (61 MP), LiDAR, multispectral, thermal |
| Operating Temp. | -20°C to 50°C | -20°C to 50°C |
2. DJI Matrice 4 Enterprise
The DJI Matrice 4 Enterprise is a flexible and powerful option for large-scale mapping and inspection operations. It combines long flight times with strong photogrammetry performance and versatile payload support.
It’s a great fit for private-sector projects that demand accuracy and efficiency, but NDAA restrictions limit its use in federal contracts.
Specifications:
| Features | Details |
| Payload Support | Multiple enterprise cameras/sensors |
| Mapping Accuracy | High-precision with RTK |
| Max Flight Time | Up to 46-49 minutes |
| Transmission Range | Up to 25 km (FCC) |
| Obstacle Avoidance | Omnidirectional with 3D infrared bottom sensor |
| Weight | 6–7 kg (depending on payload) |
While mapping looks down at the big picture, inspections flip the perspective by focusing on assets above and around us. We’ll explore this in the next section.
B) Inspection & Infrastructure Drones: Looking Up
When you need to look up instead of down, inspection drones are the tool. Operators use these drones to inspect bridges, powerlines, wind turbines, or cell towers. They’re designed to fly in confined or hazardous spaces.
Inspection drones come with zoom cameras, thermal sensors, and advanced obstacle avoidance. Pilots can safely examine structures from multiple angles, even in complex or GPS-denied environments.
1. Skydio X10
The Skydio X10 is a US-made, NDAA-compliant inspection drone powered by AI autonomy. It’s for bridge, utility, and infrastructure inspections where navigating complex structures safely is key.
Payload options include high-resolution thermal and zoom sensors, so operators can get the detail they need without manual climbs.
Specifications:
| Features | Details |
| NDAA compliance | Yes |
| Max flight time | Up to 40 min |
| Protection rating | IP55 |
| Transmission range (max)* | Up to 12 km (rural LOS); 5G option |
| Obstacle sensing | 360° vision + AI autonomy |
| Weight | 2.11 Kg |
| RTK support | Optional RTK/PPK attachment |
| Typical payloads | VT300-Z: 64MP narrow, 48MP telephoto, FLIR Boson+ thermal; VT300-L: 50MP wide, 64MP narrow, FLIR Boson+ thermal |
2. DJI Matrice 300 RTK / 350 RTK
The DJI Matrice 300 and 350 RTK are versatile enterprise drones designed for inspection and utility work. Both platforms support zoom, thermal, and LiDAR payloads.
The Matrice 350 RTK is an updated version of the DJI Matrice 300, offering enhanced weather protection, improved transmission, and safety features. While neither is NDAA-compliant, both remain popular in the private sector for their reliability and broad sensor ecosystem.
Specifications:
| Feature | Matrice 300 RTK | Matrice 350 RTK |
| NDAA Compliance | No | No |
| Max Flight Time | Up to 55 minutes | Up to 55 minutes |
| Protection Rating | IP45 | IP55 |
| Transmission Range | Up to 15 km | Up to 20 km |
| Obstacle Sensing | 6-direction sensing/positioning | 6-direction sensing/positioning |
| Payload Options | Zoom, Thermal, LiDAR (H20/H20T, P1, L1) | Zoom, Thermal, LiDAR (H20/H20T, P1, L1) Fully backward-compatible |
| Weight | 3.6 Kg | 3.77 Kg |
Why inspection drones matter
Inspection drones streamline workflows and reduce risk by replacing manual climbs, lifts, and scaffolding. They provide fast, detailed visual and thermal data, making inspections safer and more efficient.
But when the inspection goes over miles or mapping requires scale, fixed-wing drones are the way to go.
C) Fixed-Wing Drones for Large-Scale Projects
When the project needs to cover large areas, long corridors, powerlines, railroads, or highways, fixed-wing drones are the best option. They have longer flight times, higher efficiency, and greater range than multirotor platforms.
Fixed-wing drones use an airplane design to fly longer, cover more ground, and deliver survey-grade data in fewer flights. This makes them ideal for industries like transportation, utilities, and agriculture.
1. Wingtra GEN II
The WingtraOne GEN II is a fixed-wing VTOL drone built for corridor and large-area mapping. It combines the efficiency of fixed-wing flight with the flexibility of vertical takeoff and landing (VTOL), allowing operators to cover more ground per mission. With survey-grade payloads and extended endurance, it captures large, accurate datasets efficiently.
Enterprises handling geospatial projects often choose fixed-wing drones as a natural fit. It offers the endurance and coverage needed to map corridors and vast territories such as railways, highways, and mining sites.
Specifications:
| Features | Details |
| Coverage | Up to 460 hectares per flight |
| Mapping Accuracy | Down to 1 cm with PPK/RTK |
| Max Flight Time | Up to 59 minutes |
| Transmission Range | ~10 km |
| Payload Support | Survey-grade RGB & multispectral |
| Weight | ~4.5 kg |
2. Quantum Systems Trinity F90+
The Trinity F90+ is a German-made fixed-wing drone known for its endurance. It flies up to 90 minutes per mission, covering wide areas for large utility and transportation projects. Its long-range capability reduces the number of flights needed, cutting costs and improving efficiency.
Specifications:
| Features | Details |
| Mapping Accuracy | Down to 1–2 cm with PPK/RTK |
| Flight Time | Up to 90 minutes |
| Transmission Range | Up to 7.5 km (standard), extended options |
| Payload Support | RGB, multispectral, LiDAR |
| Weight | ~5 kg (with payload) |
| Camera Resolution | Up to 42 MP (Sony RX1R II option) |
| Takeoff/Landing | VTOL (vertical takeoff and landing) |
| Max Coverage | ~700 hectares (per flight, at 120 m AGL) |
| Best For | Utilities, transportation corridors, and large-area mapping |
3. Censys Technologies
Censys builds U.S.-made, NDAA-compliant VTOL drones designed for public-sector and federal use. They support EO/IR and LiDAR payloads, pairing flexible vertical takeoff with the long range of fixed-wing flight. This makes them a reliable fit for missions that require secure, compliant platforms without compromising on performance.
Specifications:
| Features | Details |
| Mapping Accuracy | Survey-grade accuracy with RTK/PPK support (centimeter-level, depending on payload and conditions) |
| Flight Time | Up to 60 minutes (depending on payload) |
| Transmission Range | Up to 20 km |
| Payload Support | EO/IR, LiDAR, custom integrations |
| Weight | ~6–7 kg (with payload) |
| Camera Resolution | EO up to 20 MP, thermal up to 640p |
| Takeoff/Landing | VTOL (vertical takeoff and landing) |
| Best For | Federal programs, public-sector mapping, secure operations |
For enterprises handling large-scale geospatial projects, fixed-wing drones offer the endurance and coverage required to complete the job effectively.
Choosing the Right Enterprise Drone: Side-by-Side Comparison
Every enterprise has different needs, whether it’s mapping, inspection, or creative media. Here’s a side-by-side comparison showing how the leading drones stack up, so you can quickly see which platform best matches your program’s goals.
| Drone Model | Type / Use Case | Flight Time | Camera / Payload Options | NDAA Compliant | Best For | Price |
| FreeFly Astro | Mapping + Cinematography | 39 minutes | 61MP photogrammetry, 4K60 10-bit video | Yes | Mixed-use: survey, mapping + media capture | $ 26,000 |
| DJI Matrice 4 Enterprise | Mapping + Inspection | 46–49 min | Multiple enterprise cameras/sensors | Uses NDAA-compliant components but restricted for federal contracts. | Enterprise mapping & inspections, thermal (4T) | $ 5,928 |
| Skydio X10 | Infrastructure Inspection | 35–40 minutes | 640×512 thermal, zoom, AI autonomy | Yes | Bridge, powerline, confined space inspections | $17,791.99 |
| DJI Matrice 350 RTK | Mapping + Inspection | 55 minutes | 20MP camera, thermal, zoom, lidar pods | No | Enterprise inspection (non-federal programs) | $11,158 |
| WingtraOne GEN II | Fixed-Wing Mapping | 59 minutes | 42MP camera, multispectral, PPK/RTK | No (Swiss) | Corridor mapping, large-area land surveys | $19,900 |
| Quantum Trinity F90+ | Fixed-Wing Mapping | 90 minutes | High-res + multispectral payloads | No (German) | Rail, roads, utilities, and endurance mapping | $24,750 |
| Censys Sentaero VTOL | Fixed-Wing Mapping | 60-80 minutes | EO/IR, multispectral, LiDAR options | NDAA-compliant, approved for federal/public programs | Utilities, energy corridor, U.S. federal work | Not listed |
What to Look For When Choosing the Right Enterprise Drone
When building an enterprise drone program, the drone must match your missions, compliance needs, and growth plans. Here are the key things to look for:
- Mission Fit: Start with what you want the drones to do. For large area mapping, fixed-wing drones with long endurance are the way to go. For close-up inspections, multirotor drones with zoom and thermal sensors work great. But if you want a drone for both creative and technical output, hybrid platforms like the Freefly Astro reduce the need for multiple drones.
- Compliance: Know the rules for your projects. Federal and public sector projects require NDAA-compliant, US-made drones. For private sector jobs, non-compliant drones may still be acceptable if cost and availability fit.
- Payload Options: Match the sensors to the data you need. Choose a platform that supports interchangeable payloads like RGB, thermal, LiDAR, or multispectral. This way, you’re not locked into one type of data.
- Endurance and Coverage: Think about how far and how long you need to fly. Fixed-wing drones maximize flight time and survey coverage. Multirotors provide maneuverability and precision in tight spaces.
- Reliability and Ecosystem: Look beyond the drone itself. Check the availability of batteries, parts, software integrations, and service support. A strong ecosystem means your drone will stay productive over the long term.
- Fleet Efficiency: Can one drone do multiple tasks? A versatile platform may offer both creative and technical work in one drone, reducing the need to operate multiple systems.
Of course, choosing the right drone isn’t about features. Regulations dictate what and where you can actually fly.
Data Management and Integration
It’s not just about flight performance and payload. The value of an enterprise drone program is in how well it collects, processes, and secures data.
Modern programs rely on integration with GIS, CAD, BIM, or inspection software. Look for platforms that offer automated data uploads, cloud storage, and APIs for seamless integration with your existing workflows.
Data security is just as important. Many public sector and utility projects require U.S. data storage to prevent sensitive information from being sent outside the country.
A platform that offers encrypted transmission, secure storage, and role-based access helps enterprises protect their geospatial and inspection data while meeting contract requirements.
Compliance & Regulations in 2025
When choosing a drone for your enterprise program in 2025, compliance is just as important as performance. Regulations determine what drones you can fly and whether your program can scale.
To stay ahead, pilots and organizations need to understand three major factors:
- Remote ID: The FAA now mandates Remote ID for nearly all drones, including those in Class G airspace. The only exceptions are drones under 250g or flights at FAA-recognized FRIA sites. For enterprise teams, this means every operational drone must be equipped with Remote ID.
- NDAA Compliance is essential for U.S. federal and public works contracts. DJI or other non-compliant drones are restricted. For government or public works programs, this makes Skydio, FreeFly, and other U.S. manufacturers the preferred choice
- UTM and BVLOS Readiness: With the FAA expanding automated UTM systems and granting more BVLOS waivers, choosing drones that are BVLOS-ready helps future-proof enterprise programs.
In short, compliance is about ensuring your drone program stays eligible, scalable, and future-ready.
Conclusion
Enterprise drones aren’t one-size-fits-all. The right choice depends on your mission, whether it’s mapping, inspections, corridor projects, or creative media.
In 2025, compliance adds another layer. Remote ID is mandatory for almost all operations, and NDAA rules determine eligibility for government contracts.
To scale with confidence and avoid costly setbacks, match your platform to both your deliverables and regulatory needs.
Here’s your next step: review your current drone operations, identify compliance gaps, assess your deliverables, and align your fleet with the right platforms.
If you’re still unsure how to move forward, join DroneU for expert guidance and a clear path to scale your enterprise program.

Best Agriculture Drones 2025: Top Picks by Task & Terrain
Labor shortages are rising, the weather is more unpredictable, and input costs keep climbing. All of this puts more pressure on farms than ever before. Not to mention reduced orders from some of our largest exporters.
Tractors and sprayers still do the heavy lifting. But agricultural drones are quietly changing how that work gets done.
These aren’t hobby drones with cameras. Today’s AG drones can spray 100 acres in under an hour. They can detect plant stress before you can see it. And they can run autonomous flights with minimal oversight.
But with so many new models hitting the market, figuring out what’s actually worth your money has become its own challenge.
Not every tool fits every job. Some drones live up to the hype. Others don’t.
Some models are built for brute-force spraying, others for high-precision data collection, and many fall somewhere in between.
So what matters now isn’t just owning a drone, it’s owning the right one for the job.
This guide is here to make the decision easier.
We’ve analyzed the top ag drones of 2025 with a focus on how they actually perform under pressure in fields, orchards, and rugged terrain.
Let’s start with what really matters when choosing a drone.
What Actually Matters When Choosing an Agricultural Drone
Choosing the right drone comes down to one thing: its intended use. What the spec sheet says is only relevant in what it tells you about the expected performance of the drone in your specific environment, crop system, and workload.
Here’s how to think about the decision, broken down by real-world goals and constraints.
1. You Need to Cover a Lot of Ground Fast
Look for high tank capacity, fast flow rate, and efficient refueling.
For large-scale spraying or spreading, you want fewer refill stops and the ability to keep batteries rotating without downtime.
A model like the DJI Agras T100 offers a 100-liter spray tank and quick-swap 30,000?mAh batteries. Those batteries can recharge in under 10 minutes.
However, the drone won’t save you time if your ground crew is chasing water or chemicals across the property.
Field Tip: Calculate your real-world coverage not just per flight, but per hour of complete workflow; battery swaps, tank fills, flight plan updates.
2. You’re Working with Uneven Terrain or Obstacles
Prioritize drones with intelligent flight controls, radar, and real-time terrain adaptation.
Flying over terraces, vineyards, or tree-dense areas?
You’ll need a drone that sees and reacts to its environment.
That means LiDAR-based terrain following, RTK positioning for centimeter-level accuracy, and obstacle detection that works at all altitudes.
The T70 and T100 combine multiple sensor types to adjust height, spray width, and avoid collisions without needing a manual course correction.
Field Tip: For orchards or irregular fields, terrain-following matters more than raw coverage. A smarter, smaller drone will outperform a bulky one that can’t fly close to the canopy.
3. Your Local Weather and Climate Is Unforgiving
Go with durability first, focus on IP ratings, wind stability, and sealed electronics. Coastal wind, dust-heavy plains, or hot, humid summers can shut down sensitive drones.
Models with high Ingress Protection (IP55 or better), sealed motors, and intelligent wind correction are designed to stay in the air when the weather gets rough.
Also, consider altitude hold features that stabilize spray patterns during gusts or slope shifts.
Field Tip: Ask the dealer what wind speeds, temperatures, and dust levels void the warranty. You’ll learn fast which models are made for tough environments.
4. You’re Mapping or Doing Precision Scouting
Choose a drone that focuses on data capture, not just flying time.
For this, you need high-resolution RGB or multispectral cameras, reliable PPK/RTK positioning, and a software pipeline that actually processes the data.
Drones like the WingtraOne Gen II or eBee X are made to fly long, capture clear data in a single pass, and deliver georeferenced outputs.
Field Tip: More megapixels or longer flight time doesn’t mean better maps. Look for sensor quality, Ground Sample Distance (GSD), and how cleanly the drone lands.
With all of this in mind, let’s dig into our list of the best drones for agriculture.
Best Drones For Agriculture: Top 7 Picks
We’ve grouped the top-performing agricultural drones of 2025 by category, so you can match your needs to the right drone.
A. High-Volume Spraying & Spreading Workhorses
If your priority is spraying or spreading large tracts quickly and efficiently, while minimizing downtime in workflow or recharge cycles, these are the drones for you:
1. DJI Agras T100
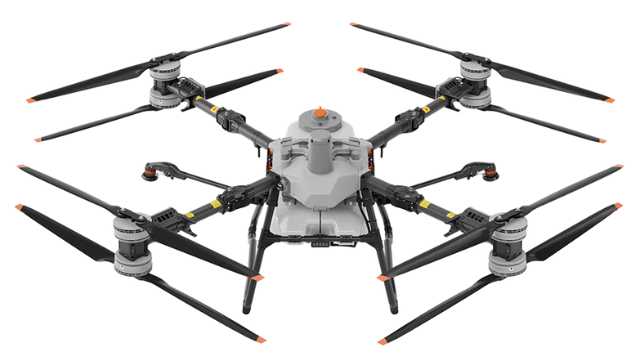
Source: DJI Agriculture
DJI’s top-tier agriculture drone, the T100, offers modular capabilities for spraying, spreading, and lifting. It pairs large capacity with fast charging and robust navigation features designed for demanding operations.
Specifications:
| Feature | Details |
| Spray Capacity | 100 L, up to 40 L/min with 4 nozzles |
| Spread Hopper | 100 L, up to 400 kg/min |
| Battery & Charging | Fast charging (~8–9 min) |
| Navigation & Safety | RTK, radar, terrain-following, 360° obstacle avoidance |
| Weight (MTOW) | High, requires robust logistics |
Pros:
- High payload and flow rates, ideal for large-scale operations.
- Rapid battery turnaround reduces idle time.
- Strong safety features for complex terrain.
- Flexible mission capability (spray, spread, lift).
Cons:
- Heavy and requires dedicated transport or a team.
- High initial investment with ROI dependent on scale.
- Requires trained operators and reliable parts support.
2. DJI Agras T70P

Source: DJI Agriculture
T70P is a mid-tier option that brings many of the T100’s key features, like radar, a spread system, and modular design. But it comes in a lighter, more agile frame, making it a better fit for orchards and medium-scale farms.
Specifications:
| Feature | Details |
| Tank Capacity | 70 L |
| Payload (Spray/Spreading) | up to 70 kg |
| Flow Rate | Spray: 30 L/min standard; 40 L/min with 4 nozzles |
| Spread Rate | 400kg/min, width 3–10 m |
| Navigation & Safety | Radar visual system 360°, RTK, phased-array radar |
| Battery & Charging | Fast charging in ~7–9 min, dual-battery setup |
| Mobility | Lighter frame than T100, more portable |
Pros:
- Good balance of payload, agility, and operational speed.
- Rapid battery swaps, low downtime.
- Best suited for medium and mixed crop terrains.
Cons:
- Lower capacity than the T100 may require more refills on large farms.
- Still requires infrastructure for charging and maintenance.
B. Mapping & Precision Agriculture
When data is your output (mapping, multispectral scouting, prescription modeling), choose any of these drones:
3. WingtraOne Gen II
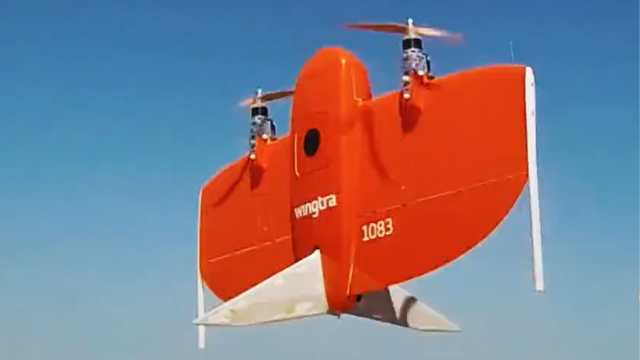
Source: WingtraOne Gen II
WingtraOne Gen II is a tail-sitting VTOL fixed-wing UAV combining easy vertical takeoff/landing with efficiency, high-resolution payloads, and centimeter-level accuracy.
Specifications:
| Feature | Details |
| Flight Time | ~59 minutes |
| Payload Capacity | Up to 800 g—supports high-res cameras |
| Navigation Accuracy | ~1 cm horizontal (PPK) |
| Range & Wind Resistance | 10 km link, handles 12 m/s sustained, 18?m/s gusts |
| ID & Durability | IP54, operational –10 to +40°C |
Pros:
- Efficient mapping with minimal equipment footprint (VTOL + fixed-wing).
- Exceptional data precision for prescription maps.
- Tolerates wind well; sturdy airframe and regulatory-friendly design.
Cons:
- Limited payload—primarily suited to imagery, not spraying.
- Higher upfront cost in mapping-specific categories.
4. AgEagle eBee X
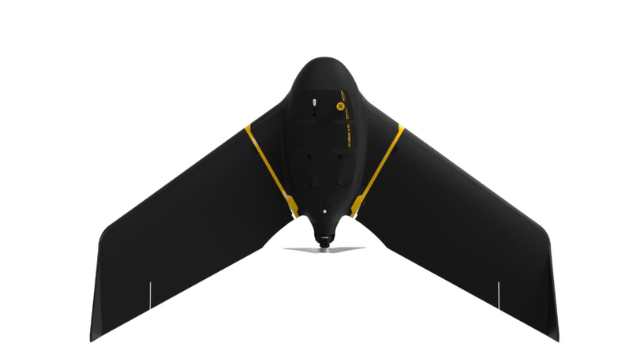
Source: eBee X
eBeeX is a lightweight NDAA-compliant fixed-wing drone, built specifically for large-area mapping. It includes RTK/PPK support, long flight endurance, and modular camera options. You can use it for multispectral, thermal, or RGB workflows depending on your mapping needs.
Specifications:
Pros:
- Amazing mapping efficiency, covers huge areas in a single flight.
- Highly accurate sensor positioning without ground control points.
- Modular and field-serviceable; strong support ecosystem.
Cons:
- No vertical takeoff makes operations harder in tight spaces.
- Purely a mapper, not built for spraying or payload delivery.
5. Trinity Pro
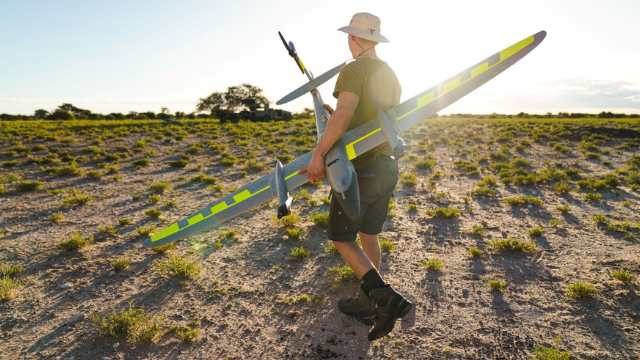
Source: Quantum Systems
The Trinity Pro from Quantum Systems is a next-generation eVTOL fixed-wing drone built for high-efficiency mapping and data collection. It combines extended range, flexible payload options, and full integration with the QBase 3D mission control software.
With up to 90 minutes of flight time and 700 hectares of coverage, it’s designed for serious agricultural professionals managing large tracts of land.
It comes with downward-facing LiDAR for safer low-altitude flight and BVLOS-ready operations.
Specifications:
| Feature | Details |
| Flight Time | Up to 90 minutes |
| Max. Coverage | ~700 hectares per flight |
| Max. Altitude (MSL) | 5,500 m (18,045 ft) |
| Max. Take-Off Weight | 5.75 kg (12.68 lbs) |
| Cruise Speed | 17 m/s (38 mph) |
| Wind Tolerance (hover phase) | Up to 11 m/s (21.4 knots) |
| Command & Control Range | 5–7.5 km (3.1–4.7 miles) |
| Payloads | Swappable: RGB, oblique, multispectral, LiDAR (quick-lock system) |
| Software Integration | QBase 3D (for planning, execution, diagnostics) |
| IP Rating | IP55 (dust and water resistance) |
Pros:
- Exceptional coverage efficiency – 700 hectares per mission sets it apart in the fixed-wing class.
- Highly adaptable payload system allows switching between imaging types (RGB, LiDAR, multispectral) within minutes.
- Smart autonomous safety features, including terrain awareness, wind simulation, and AI-powered return-to-home.
- Fully integrated QBase 3D software enables mission planning, diagnostics, and streamlined data workflows.
- IP55 rating means it’s built for tough field conditions, resistant to dust and light rain.
Cons:
- No direct spraying capability; this is a mapping/survey drone, not for application tasks.
- Initial costs and complexity may be higher for small operations compared to multirotor drones.
- Requires some training to leverage fixed-wing flight and QBase 3D mission software fully.
C. Fully Autonomous eVTOL Sprayers (Next-Gen)
Consider these drones for operations that need heavy payload capacity, minimized labor, and advanced automation.
6. Guardian SC1
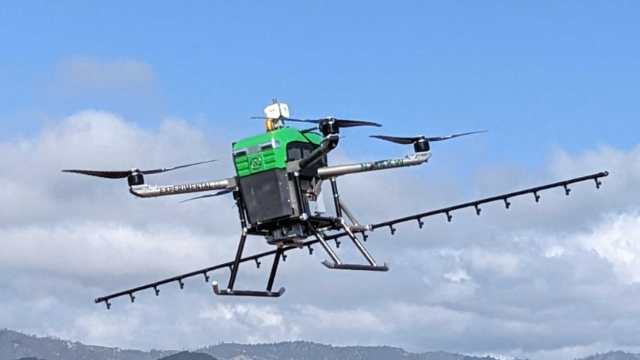
Source: Guardian Agriculture
The Guardian SC1 is the first FAA-approved electric VTOL drone built for commercial crop spraying. It combines full autonomy, precise application, and U.S.-based manufacturing. It’s designed to match the output of manned aircraft without the risks of piloted aviation.
Specifications:
| Feature | Details |
| Payload | 200 lb (76 liters) |
| Coverage | ~40 acres/hour, including charging and refill |
| Flight Time | 12–17 minutes per charge |
| Super-Charge Time | 2–3 minutes |
| Navigation & Safety | GPS-based flight plans, RTK available, low downwash for close canopy spraying |
| Regulatory Status | FAA-approved for nationwide operations |
Pros:
- First eVTOL drone cleared by FAA for U.S. commercial operations—no multi-month waivers needed.
- Built and supported in the U.S., offering simpler logistics and security.
- Super-fast charges and swift refills mean high field efficiency, despite shorter flight time.
- Designed for gentle downwash, enabling accurate application even near sensitive crops.
Cons:
- Short flight time
- At ~$300K, cost-effective versus traditional aerial spraying—but still a serious investment.
- As a newer platform, broader dealership support may still be scaling up.
7. Rotor Sprayhawk (Helicopter-Based Sprayer)
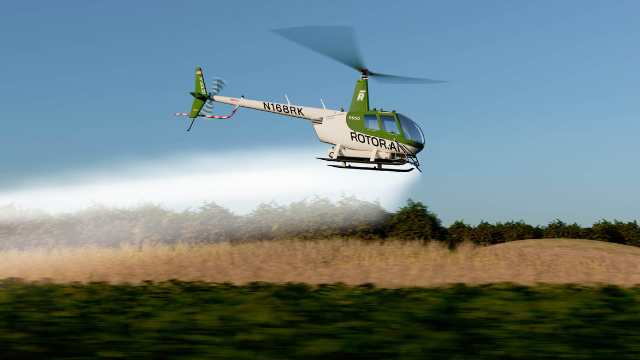
Source: Rotor Technologies
The Sprayhawk by Rotor Technologies is a retrofit of the Robinson R44 helicopter. It’s now the largest unmanned agricultural aircraft available. With spray coverage and payload comparable to fixed-wing planes, it fills the gap between small drone limitations and the high costs of manned aerial spraying.
Specifications:
| Feature | Details |
| Spray Capacity | 110 gallons (416 L) |
| Coverage | ~240 acres/hour |
| Flight Time | ~50 minutes per fuel/refill cycle |
| Payload & Platform | Robinson R44 airframe retrofitted with an autonomy pack |
| Setup & Crew | Quick deployment (<15 min), operated by a 2-person ground crew |
| Cost (Intro Price) | ~$990,000 for 2025 models (intro rate) |
| Regulatory Status | Being tested; approval underway; Brazil ANAC approved as retrofit for VLOS/EVLOS operations |
Pros:
- Handles up to 240 acres per hour—on par with manned aircraft efficiency.
- Payload is far exceeding smaller drones; ideal for large-scale commercial operations.
- Built on the well-known Robinson R44 frame, simplifying maintenance and pilot transition.
- Estimated $2/acre versus ~$3.27/acre for manned R44 and even higher for consumer drones.
Cons:
- Costs around $1 million—priced out of reach for most small or mid-size farms.
- Requires ground infrastructure, fuel management, and potentially pilot licensing.
- Full FAA certification not yet complete for U.S. commercial use; still in testing/trial phases
Comparison Table: Best Agriculture Drones by Category (2025)
| Drone | Category / Best For | Type | Payload | Flight Time | Price |
| DJI Agras T100 | High-volume spraying/spreading | Multirotor | 100L spray / 150L spread | ~18 min (full load) | USD 119,999 |
| DJI Agras T70P | Orchard/mixed-use, portable spraying | Multirotor | ~60–70L tank | 15–18 min | USD 53,999 |
| WingtraOne Gen II | Precision mapping/survey | VTOL fixed-wing | Mapping sensors only | ~59 min | USD 19,900 |
| eBee X | Professional data collection/mapping | Fixed-wing | Multiple sensor modules | Up to 90 min | Not disclosed |
| Trinity Pro | Large-scale agricultural surveying/mapping | eVTOL | ~1 Kg | Up to 90 min | USD 24,160 |
| Guardian SC1 | FAA-certified autonomous spraying | eVTOL | 200 lb (76L) spray | 12–17 min | USD 119,000 |
| Rotor Sprayhawk | Large-scale aerial spraying | Helicopter-style | 110 gallons (416 L) | ~50 min | USD 990,000 |
Real-World Use Cases: What Works Where
This section breaks down how top agricultural drones handle different real-world conditions, from broadacre crops to vineyards, and mapping to spraying. The goal is to help you match the right machine to the right job, with fewer surprises in the field.
1. Large Row Crop Farms (Corn, Soybean, Wheat)
In the heart of America’s row-crop belt, where fields stretch for hundreds or even thousands of acres, speed and scale are everything.
These operations often require broad applications of herbicides, pesticides, or foliar nutrients. To stay efficient, they need to cover large areas with as little downtime as possible. For such use cases, the DJI Agras T100 and the Guardian SC1 are standout options.
Both drones minimize chemical waste, reduce soil compaction, and boost application timing precision, critical for ROI in large-field agronomy.
2. Vineyards and Orchards
In perennial crops like grapes, apples, or citrus, drone spraying requires more finesse than brute force. The terrain is often rugged or sloped, and canopy heights vary across rows and varieties.
A large, bulky sprayer that’s perfect for flat cornfields may be inefficient or even dangerous. That’s why the DJI Agras T70 and T60 are better suited for these environments.
These drones use high-precision terrain-following radar. They’re also more agile during takeoff, especially in tight field margins. That makes them a practical choice for growers working on hilly or segmented plots.
If your work revolves around high-value, specialty crops, this class of drone offers a significant edge in both yield protection and chemical efficiency.
3. Mapping for Variable-Rate Inputs
When the goal is insight, not application, mapping drones become essential. These platforms help operators detect crop stress, variability, and terrain changes long before issues show up at harvest.
For professionals creating NDVI imagery, prescription maps, or elevation models, fixed-wing drones like the WingtraOne Gen II and eBee X are purpose-built for the job.
Both support modular sensors, including RGB, multispectral, and thermal options. This flexibility helps agronomists and service providers get detailed crop health and water stress data.
If your operation depends on actionable data, these platforms return their value in both flight time and the decisions they unlock.
4. Terraced or Mountainous Terrain
In hilly regions from California almond groves to Appalachian orchards, terrain introduces serious complexity for unmanned spraying.
Stable altitude hold, terrain sensing, and rotor thrust matter far more than they do on level ground.
In hilly terrain, the DJI Agras T70 shines. Its onboard radar and RTK system let it follow elevation contours with precision.
For bigger, industrial-scale jobs, the Rotor Sprayhawk is next-level. This autonomous helicopter drone, based on the Robinson R44, offers high lift and handles slopes well.
Although still awaiting U.S. approval, the Sprayhawk has already proven effective in Brazil, flying rugged landscapes with little pilot intervention.
Final Take
The best agriculture drone isn’t defined by specs alone; it’s defined by how well it fits your task, terrain, and workflow.
For high-volume spraying across large fields, the DJI Agras T100 or Guardian SC1 offers speed and efficiency at scale.
If you’re dealing with hills, orchards, or confined areas, the Agras T70 provides more precision and agility.
For mapping, platforms like WingtraOne, Trinity Pro, or eBee X deliver the data quality needed for serious agronomy and variable-rate planning.
And for operators managing thousands of acres or replacing manned aerial applicators, the Rotor Sprayhawk enters a league of its own. With a 110-gallon tank and 240 acres covered per hour, it’s built for large-scale, fast, and precise operations, especially in challenging terrain.
Beyond performance, long-term value comes from support. Look for brands with reliable parts access, responsive service, and software that stays updated.
And if you’re still deciding, test first; many suppliers offer field demos or pilot programs so you can see what works before committing.
-
 Brinc Admits, We Caused the DJI Drone Ban! EXCLUSIVE
-
 Brinc Admits they're behind DJI Ban | Auterion Creates Drone Swarm Brain
-
 Trump Card on the DJI Ban, May be Best drone news of 2025. Will he tiktok DJI?
-
 This Drone Trick Makes Real Estate Videos Awesome!
-
 Exploring Drone Security: Opportunities and Challenges
More on Hot Topics